crwdns2933423:0crwdne2933423:0

Remplacement de l'écran LCD de la Nintendo Switch Lite

crwdns2931527:0crwdnd2931527:0crwdnd2931527:0crwdnd2931527:0crwdne2931527:0

crwdns2936315:0crwdne2936315:0
crwdns2936317:0crwdne2936317:0
crwdns2931653:013crwdne2931653:0
Nintendo Switch Lite LCD Replacement: crwdns2935265:00crwdnd2935265:01crwdnd2935265:03crwdne2935265:0 Nintendo Switch Lite LCD Replacement: crwdns2935265:00crwdnd2935265:02crwdnd2935265:03crwdne2935265:0 Nintendo Switch Lite LCD Replacement: crwdns2935265:00crwdnd2935265:03crwdnd2935265:03crwdne2935265:0
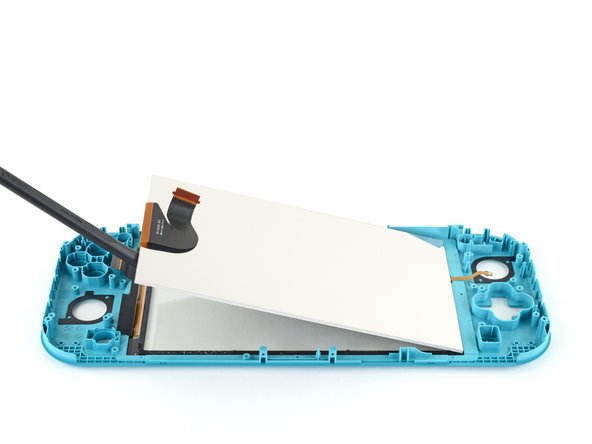
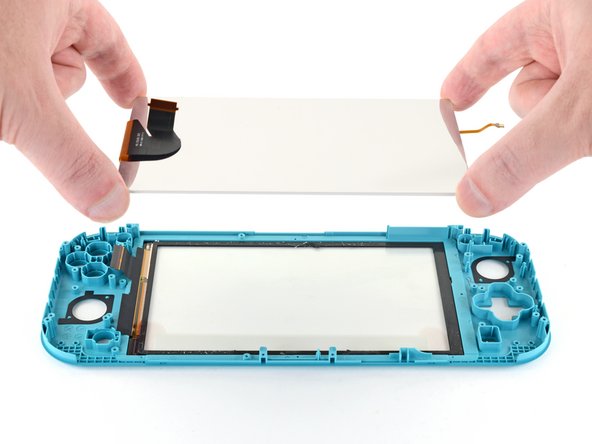
  • Use the flat end of a spudger or your fingers to lift the LCD up and out of the frame to remove it.

  • If you're reusing the LCD (or your new LCD does not come with pre‑installed adhesive), follow this guide to install pre-cut adhesive around the perimeter before reassembly.

Servez-vous de l'extrémité plate d'une spatule ou de vos doigts pour soulever l'écran LCD du châssis et le retirer.

Si vous réutilisez votre écran LCD (ou que votre nouvel écran LCD pièce ne comprend pas d'adhésif préinstallé), consultez ce tutoriel pour poser de l'adhésif prédécoupé sur les bords avant le remontage.

crwdns2944171:0crwdnd2944171:0crwdnd2944171:0crwdnd2944171:0crwdne2944171:0