crwdns2933423:0crwdne2933423:0

Switch Pro 컨트롤러 케이스 교체

crwdns2931529:0crwdnd2931529:0crwdnd2931529:0crwdnd2931529:07crwdnd2931529:0crwdne2931529:0

crwdns2935425:01crwdne2935425:0

crwdns2936315:0crwdne2936315:0
crwdns2936325:0crwdne2936325:0
crwdns2931653:01crwdne2931653:0
Switch Pro Controller Case Replacement, Remove the screws: crwdns2935265:00crwdnd2935265:01crwdnd2935265:03crwdne2935265:0 Switch Pro Controller Case Replacement, Remove the screws: crwdns2935265:00crwdnd2935265:02crwdnd2935265:03crwdne2935265:0 Switch Pro Controller Case Replacement, Remove the screws: crwdns2935265:00crwdnd2935265:03crwdnd2935265:03crwdne2935265:0
Remove the screws
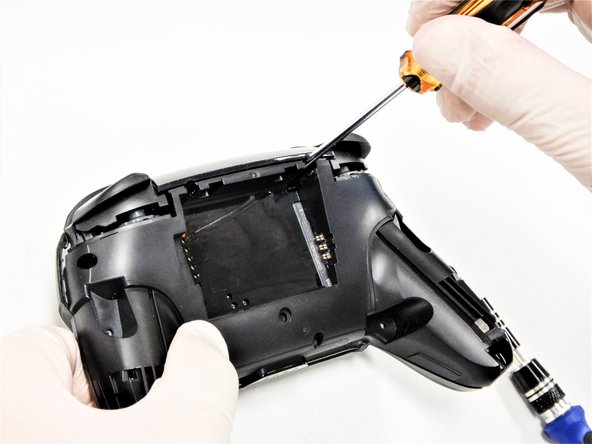
  • Use a Phillips #1 screwdriver to remove the five 5 mm screws from the back of the controller.

  • The two case screws above the handgrips and the single case screw below the battery bay have a shallow seat. These three screws can be easily removed.

  • The two case screws adjacent to the ZR and ZL shoulder buttons have a deep seat. Use an extension or a Phillips screwdriver with a longer shaft to reach these screws.

Phillips/십자 #1 드라이버를 사용하여 컨트롤러 후면에서 5mm 나사 다섯 개를 풀어주세요.

손잡이 위의 케이스 나사 2개와 배터리 베이 아래의 케이스 나사 1개는 얕은 위치에 있습니다. 이 나사 세 개는 쉽게 풀 수 있습니다.

ZRZL 숄더 버튼 옆에 있는 케이스 나사 두 개는 깊이가 깊습니다. 이 나사에 접근하려면 연장 또는 샤프트가 긴 십자 드라이버를 사용하세요.

crwdns2944171:0crwdnd2944171:0crwdnd2944171:0crwdnd2944171:0crwdne2944171:0