crwdns2933423:0crwdne2933423:0

Sustitución de la Carcasa del Controlador Switch Pro

crwdns2931529:0crwdnd2931529:0crwdnd2931529:0crwdnd2931529:07crwdnd2931529:0crwdne2931529:0

crwdns2935425:01crwdne2935425:0

crwdns2936315:0crwdne2936315:0
crwdns2936331:0crwdne2936331:0
crwdns2931653:01crwdne2931653:0
Switch Pro Controller Case Replacement, Remove the screws: crwdns2935265:00crwdnd2935265:01crwdnd2935265:03crwdne2935265:0 Switch Pro Controller Case Replacement, Remove the screws: crwdns2935265:00crwdnd2935265:02crwdnd2935265:03crwdne2935265:0 Switch Pro Controller Case Replacement, Remove the screws: crwdns2935265:00crwdnd2935265:03crwdnd2935265:03crwdne2935265:0
Remove the screws
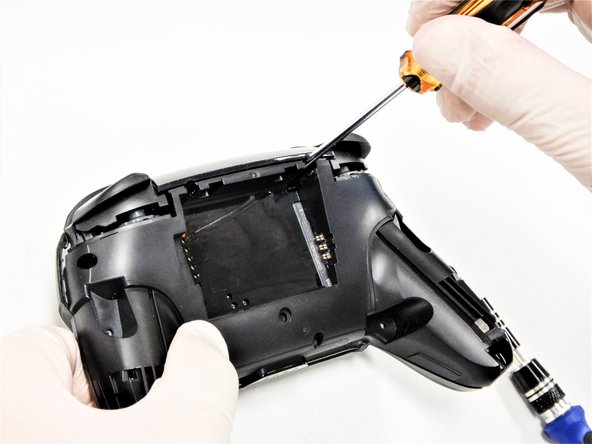
  • Use a Phillips #1 screwdriver to remove the five 5 mm screws from the back of the controller.

  • The two case screws above the handgrips and the single case screw below the battery bay have a shallow seat. These three screws can be easily removed.

  • The two case screws adjacent to the ZR and ZL shoulder buttons have a deep seat. Use an extension or a Phillips screwdriver with a longer shaft to reach these screws.

Usa un destornillador Phillips #1 para quitar los cinco tornillos de 5 mm de largo de la parte posterior del controlador.

Los tornillos ubicados en la parte superior de los mangos y el tornillo ubicado debajo del hueco de la batería se hallan en huecos poco profundos y pueden quitarse sin dificultad.

Los dos tornillos ubicados a los lados de los botones ZR y ZL se hallan en huecos bastante profundos. Necesitarás un extensor, o un destornillador Phillips lo suficientemente largo para alcanzar los tornillos.

crwdns2944171:0crwdnd2944171:0crwdnd2944171:0crwdnd2944171:0crwdne2944171:0