crwdns2933423:0crwdne2933423:0

Jura ENA micro 9 opening procedure

crwdns2931529:0crwdnd2931529:0crwdnd2931529:0crwdnd2931529:07crwdnd2931529:0crwdne2931529:0

crwdns2936319:0crwdne2936319:0
crwdns2936315:0crwdne2936315:0
crwdns2931653:010crwdne2931653:0
Jura ENA micro 9 öffnen: crwdns2935265:00crwdnd2935265:01crwdnd2935265:03crwdne2935265:0 Jura ENA micro 9 öffnen: crwdns2935265:00crwdnd2935265:02crwdnd2935265:03crwdne2935265:0 Jura ENA micro 9 öffnen: crwdns2935265:00crwdnd2935265:03crwdnd2935265:03crwdne2935265:0
  • Lege die Maschine auf die Seite.

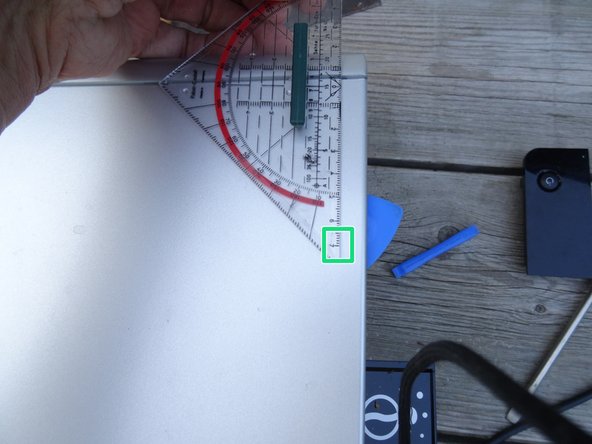
  • Heble das Seitenteil etwa 7 cm vom vorderen Rand entfernt etwa 3 mm hoch. Dadurch kommt die Raste aus ihrer Öffnung heraus. Benutze einen starkes Werkzeug, besser eines aus Kunststoff.

  • Position der keilförmigen Raste: 7 cm vom vorderen Rand, 1,5 cm vom oberen bzw. unteren Rand entfernt.

  • Lasse das Werkzeug stecken. Setze 7 cm vom vorderen Rand entfernt ein Plektrum in den Spalt ein, so dass die keilförmige Raste nicht mehr in ihre Öffnung eingreifen kann. Ziehe das Werkzeug heraus.

  • Setze auf gleiche Weise am gegenüberliegenden Rand ein weiteres Plektrum ein.

  • Jetzt sind beide Rasten frei und das Seitenteil kann im nächsten Schritt verschoben werden.

Lay the machine on its side.

Pry the side panel about 7 cm from the front edge, about 3 mm high. This will cause the catch to come out of its opening. Use a strong tool, preferably one made of plastic.

Position of the wedge-shaped notch: 7 cm from the front edge, 1.5 cm from the top or bottom edge.

Leave the tool in place. Insert an opening pick 7 cm from the front edge so that the wedge-shaped notch can no longer engage in its opening. Pull out the tool.

In the same way, insert another opening pick on the opposite edge.

Now both notches are free and the side part can be moved in the next step.

crwdns2944171:0crwdnd2944171:0crwdnd2944171:0crwdnd2944171:0crwdne2944171:0