crwdns2933423:0crwdne2933423:0

How to Disassemble a Small Guitar Amplifier

crwdns2931527:0crwdnd2931527:0crwdnd2931527:0crwdnd2931527:0crwdne2931527:0

crwdns2935425:06crwdne2935425:0

crwdns2936315:0crwdne2936315:0
crwdns2936323:0crwdne2936323:0
crwdns2931653:06crwdne2931653:0
How to Disassemble a Small Guitar Amplifier, Discharging capacitors: crwdns2935265:00crwdnd2935265:01crwdnd2935265:03crwdne2935265:0 How to Disassemble a Small Guitar Amplifier, Discharging capacitors: crwdns2935265:00crwdnd2935265:02crwdnd2935265:03crwdne2935265:0 How to Disassemble a Small Guitar Amplifier, Discharging capacitors: crwdns2935265:00crwdnd2935265:03crwdnd2935265:03crwdne2935265:0
Discharging capacitors
  • Electrolytic capacitors can hold a dangerous charge for months or even years after a device has been powered off, thus, it is always a good safety practice to discharge the capacitors before working on an audio amplifier

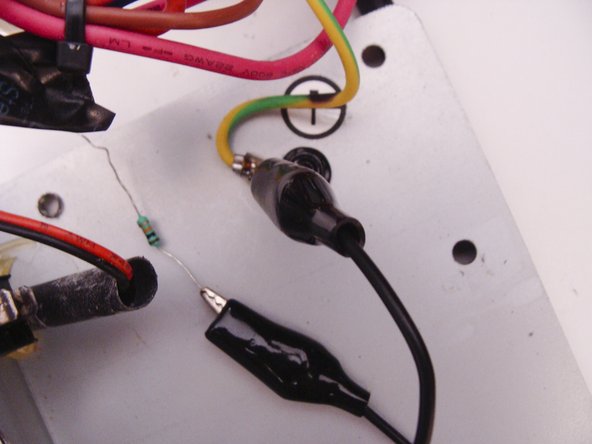
  • Connect one end of an alligator lead to the chassis ground, and the other lead to an 10K ohm resistor

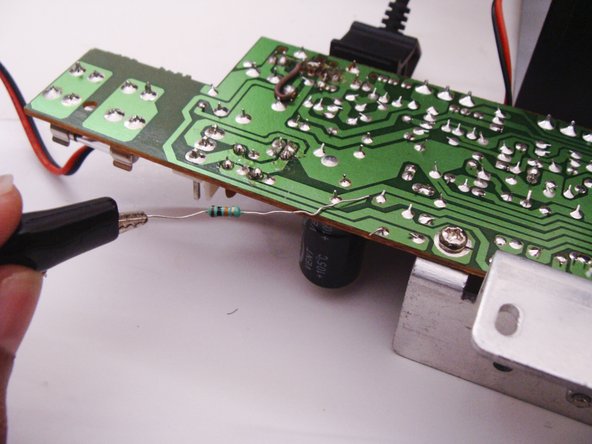
  • Identify the power supply capacitors and touch the 10K ohm resistor's open lead to each of it's leads for a few seconds

  • If you are paranoid, you may check with a voltmeter to ensure that the capacitors are safely discharged

  • It should now be safe to work on your amplifier's circuit board

crwdns2935429:0crwdne2935429:0

crwdns2935429:0crwdne2935429:0

crwdns2935429:0crwdne2935429:0

crwdns2935429:0crwdne2935429:0

crwdns2935429:0crwdne2935429:0

crwdns2944171:0crwdnd2944171:0crwdnd2944171:0crwdnd2944171:0crwdne2944171:0