crwdns2933423:0crwdne2933423:0

Actualización del ventilador CR-10S Pro Noctua

crwdns2936315:0crwdne2936315:0
crwdns2936331:0crwdne2936331:0
crwdns2931653:04crwdne2931653:0
CR-10S Pro Noctua Fan Upgrade, Installing PSU Fan: crwdns2935265:00crwdnd2935265:01crwdnd2935265:03crwdne2935265:0 CR-10S Pro Noctua Fan Upgrade, Installing PSU Fan: crwdns2935265:00crwdnd2935265:02crwdnd2935265:03crwdne2935265:0 CR-10S Pro Noctua Fan Upgrade, Installing PSU Fan: crwdns2935265:00crwdnd2935265:03crwdnd2935265:03crwdne2935265:0
Installing PSU Fan
  • Unplug the original fan cable

  • Original fan cable is glued down. Gently, pull up on the cable to remove after you unplug the connector

  • Route the new fan cable under the white wires

  • Plug in new fan cable

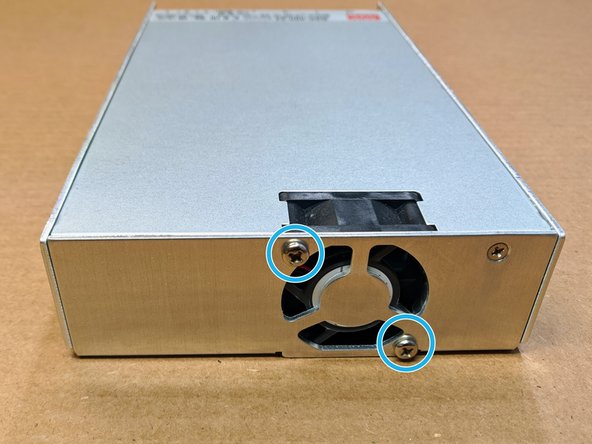
  • Mount fan with Self tapping screws included in the kit

  • Pay attention to the fan orientation and wire placement

  • Follow step 2 in reverse for reinstallation of the PSU cover

Desconecta el cable original del ventilador.

El cable del ventilador original está pegado. Con cuidado, tira hacia arriba del cable para quitarlo después de desconectar el conector.

Pasa el nuevo cable del ventilador por debajo de los cables blancos.

Enchufa el nuevo cable del ventilador

Montaje ventilador con tornillos autorroscantes incluidos en el kit

Presta atención a la orientación del ventilador y la ubicación de los cables.

Sigue el paso 2 a la inversa para reinstalar la cubierta de la PSU

crwdns2944171:0crwdnd2944171:0crwdnd2944171:0crwdnd2944171:0crwdne2944171:0