crwdns2933423:0crwdne2933423:0

HP 255 G2 Disassembly Guide

crwdns2936319:0crwdne2936319:0
crwdns2936315:0crwdne2936315:0
crwdns2931653:06crwdne2931653:0
HP 255 G2 Demontage, Gehäuseschrauben und ZIF-Verbindungen lösen: crwdns2935265:00crwdnd2935265:01crwdnd2935265:03crwdne2935265:0 HP 255 G2 Demontage, Gehäuseschrauben und ZIF-Verbindungen lösen: crwdns2935265:00crwdnd2935265:02crwdnd2935265:03crwdne2935265:0 HP 255 G2 Demontage, Gehäuseschrauben und ZIF-Verbindungen lösen: crwdns2935265:00crwdnd2935265:03crwdnd2935265:03crwdne2935265:0
Gehäuseschrauben und ZIF-Verbindungen lösen
  • Um weiter zur Festplatte zu kommen, musst du alle Gehäuseschrauben lösen und die beiden Gehäusehälften (Boden und Tastatur) voneinader lösen.

  • Entferne mit dem PH0 Schraubenzieher die 15 Schrauben, siehe Bild. Es sind alles die gleichen Schrauben, du brauchst dir also nicht zu merken, wo welche Schraube saß.

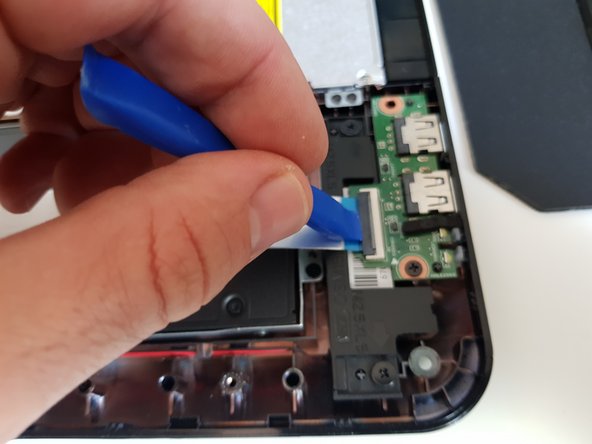
  • Klappe die schwarzen Kläppchen an den drei ZIF-Verbindungen vorsichtig mit dem Opening Tool nach oben. Das Bild zeigt eine ZIF-Verbindung an einem anderen Teil des Laptops und dient nur der Illustration, wo das Opening Tool anzusetzen ist.

  • Zieh die Ribbon-Kabel vorsichtig aus den ZIF-Verbindungen.

To get to the hard drive, you have to loosen all case screws and detach the two case halves (bottom and keyboard) from each other.

Use the PH0 screwdriver to remove the 15 screws, see picture. They're all the same screws, so you don't need to remember which screw went where.

Use the opening tool to carefully fold up the black flaps on the three ZIF connections. The image shows a ZIF connection on a different part of the laptop and is only for illustration of where to place the opening tool.

Gently pull the ribbon cables out of the ZIF connectors.

crwdns2944171:0crwdnd2944171:0crwdnd2944171:0crwdnd2944171:0crwdne2944171:0