crwdns2931529:0crwdnd2931529:0crwdnd2931529:0crwdnd2931529:03crwdnd2931529:0crwdne2931529:0
crwdns2935425:01crwdne2935425:0
crwdns2931653:01crwdne2931653:0

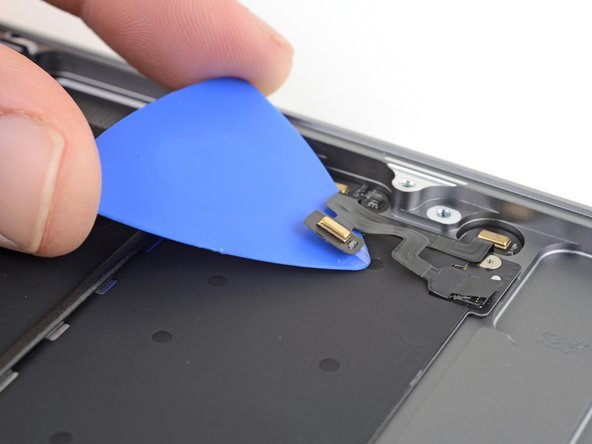


Remove the microphone assembly
-
Slide an opening pick under the microphone farthest away from the edge of the case to slice through the adhesive securing it to the upper case.
crwdns2944171:0crwdnd2944171:0crwdnd2944171:0crwdnd2944171:0crwdne2944171:0