crwdns2931527:0crwdnd2931527:0crwdnd2931527:0crwdnd2931527:0crwdne2931527:0
crwdns2935425:09crwdne2935425:0
crwdns2931653:09crwdne2931653:0


-
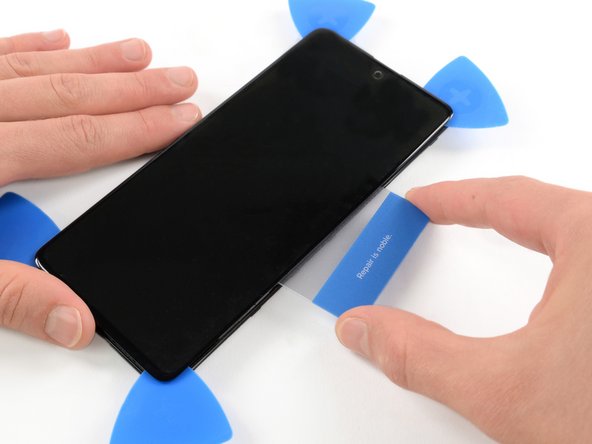
Insert a plastic card on the left edge into the gap between display and the phone assembly.
-
Press the plastic card in and slide it back and forth until you cut through the entire adhesive.
-
Once you are sure you cut through the adhesive, remove the four opening picks from the corners.
| - | [* black] Insert a plastic card on the left edge into the gap between display and the phone assembly. |
|---|---|
| + | [* black] Insert a [product|IF145-101|plastic card] on the left edge into the gap between display and the phone assembly. |
| [* black] Press the plastic card in and slide it back and forth until you cut through the entire adhesive. | |
| [* black] Once you are sure you cut through the adhesive, remove the four opening picks from the corners. | |
| [* icon_caution] Do not remove the screen completely yet. The display cable is still threaded through the frame. |
crwdns2944171:0crwdnd2944171:0crwdnd2944171:0crwdnd2944171:0crwdne2944171:0