crwdns2933423:0crwdne2933423:0

Depth Sensor Node Bridge Mounted Replacement Procedure

crwdns2936315:0crwdne2936315:0
crwdns2936323:0crwdne2936323:0
crwdns2931653:05crwdne2931653:0
Depth Sensor Node Bridge Mounted Replacement Procedure, Attaching the U-brackets to the bridge mount: crwdns2935265:00crwdnd2935265:01crwdnd2935265:03crwdne2935265:0 Depth Sensor Node Bridge Mounted Replacement Procedure, Attaching the U-brackets to the bridge mount: crwdns2935265:00crwdnd2935265:02crwdnd2935265:03crwdne2935265:0 Depth Sensor Node Bridge Mounted Replacement Procedure, Attaching the U-brackets to the bridge mount: crwdns2935265:00crwdnd2935265:03crwdnd2935265:03crwdne2935265:0
Attaching the U-brackets to the bridge mount
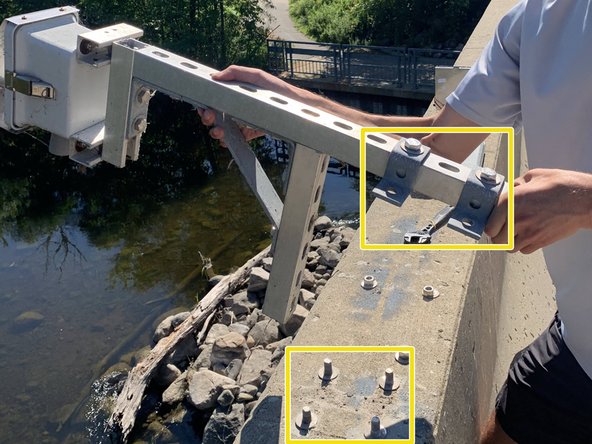
  • This is what the bridge mount looks like before reattaching the long strut channel with the new depth sensor node.

  • Line up and place the U-brackets, still attached to the long strut channel, onto the bridge mount.

  • Once again, hold the node securely to ensure it does not fall while the U-brackets are being attached to the bridge mount.

  • This step will use the same 3/4" nuts and washers from the first step.

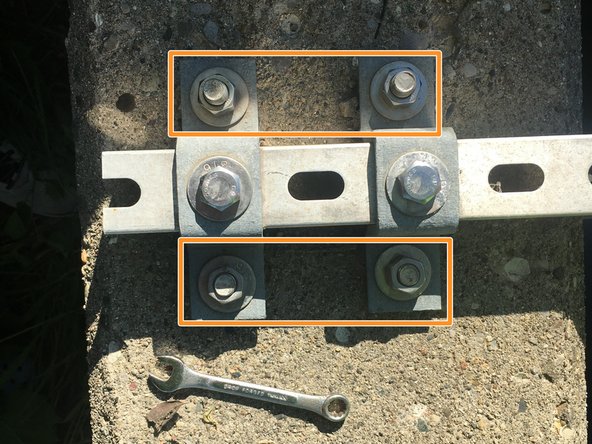
  • Using a 3/4" adjustable or socket wrench, secure the long strut channel and U-brackets to the bridge with the 3/4" nuts and washers. Tighten and secure.

crwdns2935429:0crwdne2935429:0

crwdns2935429:0crwdne2935429:0

crwdns2935429:0crwdne2935429:0

crwdns2935429:0crwdne2935429:0

crwdns2935429:0crwdne2935429:0

crwdns2944171:0crwdnd2944171:0crwdnd2944171:0crwdnd2944171:0crwdne2944171:0