crwdns2933423:0crwdne2933423:0

Démontage de la machine à pain

crwdns2936315:0crwdne2936315:0
crwdns2936317:0crwdne2936317:0
crwdns2931653:02crwdne2931653:0
Bread Maker Teardown, Remove the screws: crwdns2935265:00crwdnd2935265:01crwdnd2935265:02crwdne2935265:0 Bread Maker Teardown, Remove the screws: crwdns2935265:00crwdnd2935265:02crwdnd2935265:02crwdne2935265:0
Remove the screws
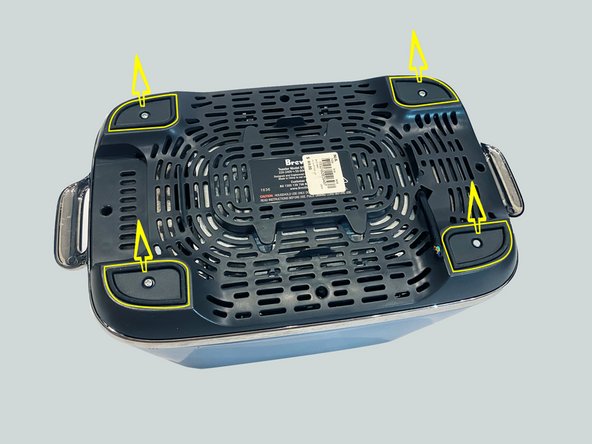
  • From the bottom, the bread maker has 4 screws securing two pieces of the shell.

  • Time to cut it open!First thing’s first, let’s turn over the machine, there are 4 screw in sight, therefore a screw driver is up.

  • Take a closer look after removing the screws on the bottom, we can see there are still 4 plastic pads and silicon circles that are waiting to be taken away.

À partir du bas, la machine à pain a 4 vis fixant deux morceaux de la coque.

Il est temps de l'ouvrir ! Tout d'abord, retournons la machine, il y a 4 vis en vue, donc un tournevis est en place.

Regardez de plus près après avoir retiré les vis du bas, nous pouvons voir qu'il reste encore 4 coussinets en plastique et des cercles en silicone qui attendent d'être enlevés.

crwdns2944171:0crwdnd2944171:0crwdnd2944171:0crwdnd2944171:0crwdne2944171:0