crwdns2933423:0crwdne2933423:0

Reemplazo del ensamblaje de pantalla del MacBook Pro 13" Retina Display Late 2012

crwdns2931529:0crwdnd2931529:0crwdnd2931529:0crwdnd2931529:02crwdnd2931529:0crwdne2931529:0

crwdns2936315:0crwdne2936315:0
crwdns2936331:0crwdne2936331:0
crwdns2931653:05crwdne2931653:0
MacBook Pro 13" Retina Display Late 2012 Display Assembly Replacement: crwdns2935265:00crwdnd2935265:01crwdnd2935265:02crwdne2935265:0 MacBook Pro 13" Retina Display Late 2012 Display Assembly Replacement: crwdns2935265:00crwdnd2935265:02crwdnd2935265:02crwdne2935265:0
  • Open the MacBook Pro approximately 110 degrees, and place it sideways on the table, as shown.

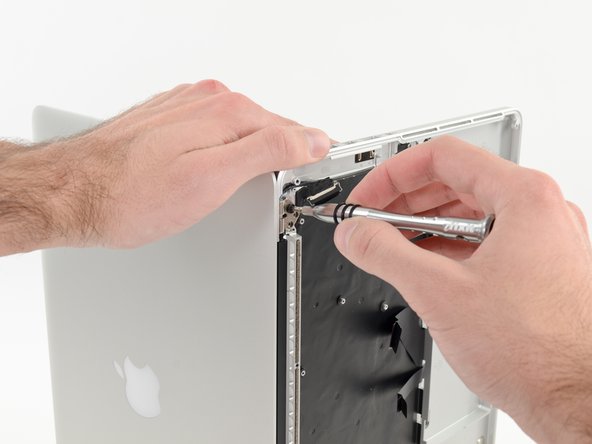
  • While holding the display and upper case together with your left hand, remove the remaining T8 Torx screw from the lower display bracket.

  • Be sure to hold the display and upper case together with your left hand. Failure to do so may cause the freed display/upper case to fall, potentially damaging each component.

  • Remove the last remaining T8 Torx screw securing the display to the upper case.

Abre el MacBook Pro aproximadamente 110 grados y colócalo de lado sobre la mesa, como se muestra. texto en cursiva

Mientras sujetas la pantalla y la carcasa superior con la mano izquierda, retira el tornillo Torx T8 restante del soporte inferior de la pantalla.

Asegúrate de sujetar la pantalla y la caja superior con la mano izquierda. De lo contrario, la pantalla/carcasa superior liberada podría caerse y dañarse.

Retira el último tornillo Torx T8 restante que sujeta la pantalla a la caja superior.

crwdns2944171:0crwdnd2944171:0crwdnd2944171:0crwdnd2944171:0crwdne2944171:0