crwdns2935425:06crwdne2935425:0


-
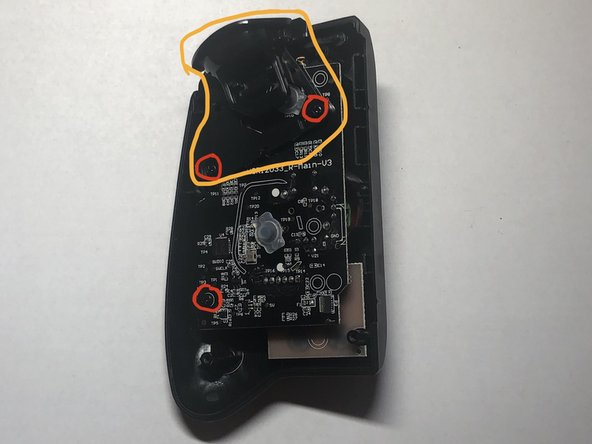
The ZR button can be removed once the red circled screws are removed.
-
The R button is underneath the ZR button and is easily removed once the ZR button is out of the way. There is a small hole that one end of the R button fits into.
-
Remove three PH0 screws, two that hold the ZR button plastics and one on the top main board.
-
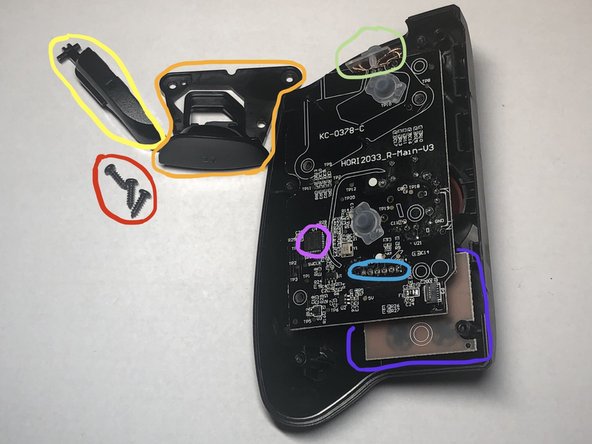
The processor for the controller can be seen on the top main board. See the details in Step 9??
-
The connector between the top and bottom boards is shown here.
-
The bottom board on the right controller is small and only picks up the bottom three buttons which using a small 6 pin connector.
-
Warning: Do not try to remove the top main board before you remove this small button board in the next step.
crwdns2944171:0crwdnd2944171:0crwdnd2944171:0crwdnd2944171:0crwdne2944171:0