crwdns2935425:04crwdne2935425:0
crwdns2931653:04crwdne2931653:0

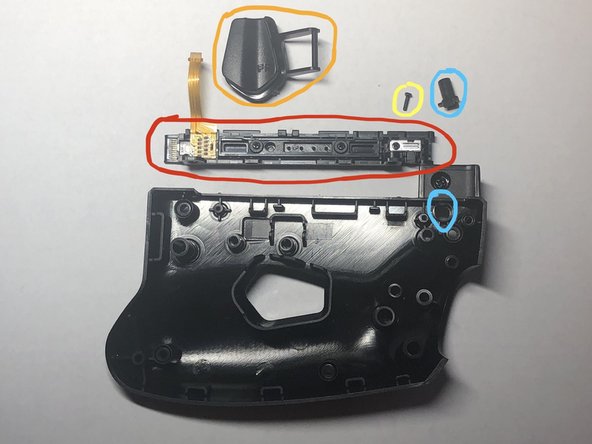


Disassemble back half
-
Remove one PH00 screw that is securing the rail to the back half.
-
The FR button can be removed by placing a lever/spudger under the circled area.
-
The rail connector can be removed once the yellow circled screw is removed.
-
The button that releases the buckle lock can be removed after the rail and goes in the hole circled on the back half of the controller.
-
The one remaining screw (not marked) does not need to be removed as it only secures a bit of plastic.
crwdns2944171:0crwdnd2944171:0crwdnd2944171:0crwdnd2944171:0crwdne2944171:0