crwdns2933423:0crwdne2933423:0

Bissell ION Rechargeable Vacuums Lithium Ion battery pack schematic

crwdns2935425:02crwdne2935425:0

crwdns2936315:0crwdne2936315:0
crwdns2936313:0crwdne2936313:0
crwdns2931653:02crwdne2931653:0
Bissell ION Rechargeable Vacuums Lithium Ion battery pack schematic, Assembling the battery pack: crwdns2935265:00crwdnd2935265:01crwdnd2935265:03crwdne2935265:0 Bissell ION Rechargeable Vacuums Lithium Ion battery pack schematic, Assembling the battery pack: crwdns2935265:00crwdnd2935265:02crwdnd2935265:03crwdne2935265:0 Bissell ION Rechargeable Vacuums Lithium Ion battery pack schematic, Assembling the battery pack: crwdns2935265:00crwdnd2935265:03crwdnd2935265:03crwdne2935265:0
Assembling the battery pack
  • Detach old battery pack (photo 1) from circuit board. My power leads were crimped, and easily de-crimped with a needle nose pliers.

  • Gently pry 3-wire female plug from circuit board.

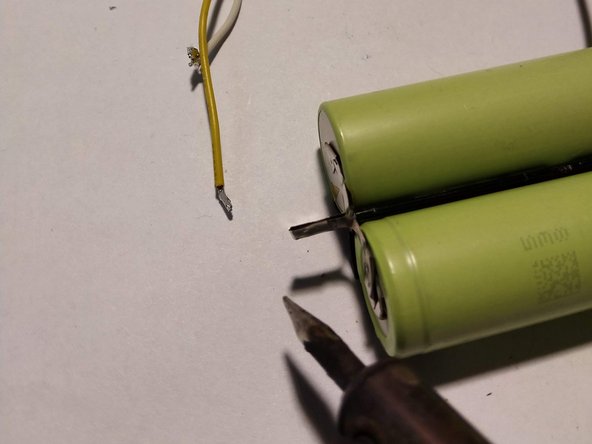
  • Disassemble/desolder old pack. Loose assemble the new batteries. I used the old holding bracket (photo 2) and wires.

  • Solder batteries together according to schematic (photo 3.) Wrap completed pack in shrink wrap or electrical tape.

  • Connect (+) and (-) leads with crimps, solder, or small wire nuts. I used wire nuts.

  • Reconnect 3-wire plug to circuit board.

  • Place battery pack in handle location, and reassemble vacuum.

crwdns2935429:0crwdne2935429:0

crwdns2935429:0crwdne2935429:0

crwdns2935429:0crwdne2935429:0

crwdns2935429:0crwdne2935429:0

crwdns2935429:0crwdne2935429:0

crwdns2935429:0crwdne2935429:0

crwdns2935429:0crwdne2935429:0

crwdns2944171:0crwdnd2944171:0crwdnd2944171:0crwdnd2944171:0crwdne2944171:0