crwdns2933423:0crwdne2933423:0

Nintendo Switch Joy-Con (links) Gehäuse tauschen

crwdns2936315:0crwdne2936315:0
crwdns2936319:0crwdne2936319:0
crwdns2931653:014crwdne2931653:0
Nintendo Switch Left Joy-Con Shell Replacement, Removing the joystick 1/2: crwdns2935265:00crwdnd2935265:01crwdnd2935265:02crwdne2935265:0 Nintendo Switch Left Joy-Con Shell Replacement, Removing the joystick 1/2: crwdns2935265:00crwdnd2935265:02crwdnd2935265:02crwdne2935265:0
Removing the joystick 1/2
  • Remove the screws holding the joystick in place.

  • The top-left screw is covered by the L button's flex cable.

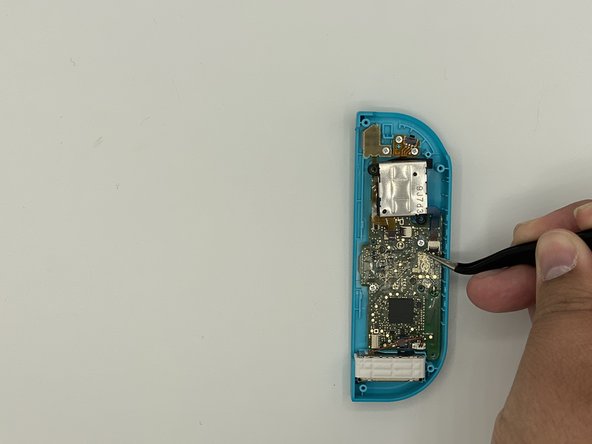
  • Unlock the ZIF connector and remove the ribbon cable using tweezers.

Entferne die Schrauben, mit denen der Joystick befestigt ist.

Entriegle den ZIF-Anschluss und entferne das Flachbandkabel mit einer Pinzette.

crwdns2944171:0crwdnd2944171:0crwdnd2944171:0crwdnd2944171:0crwdne2944171:0