crwdns2935425:012crwdne2935425:0
crwdns2931653:012crwdne2931653:0

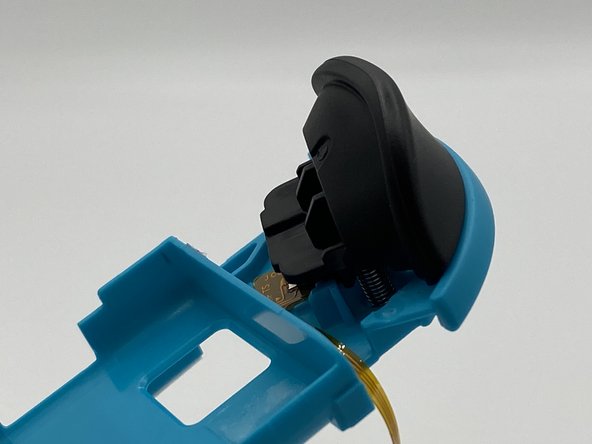


Removing the triggers 1/2
-
Depress the latch underneath the trigger using tweezers. Gently pry the trigger off.
crwdns2944171:0crwdnd2944171:0crwdnd2944171:0crwdnd2944171:0crwdne2944171:0