crwdns2933423:0crwdne2933423:0

Desmontaje del Hyperkin Duke

crwdns2936315:0crwdne2936315:0
crwdns2936331:0crwdne2936331:0
crwdns2931653:010crwdne2931653:0
Hyperkin Duke Teardown, D-Pad assembly removal: crwdns2935265:00crwdnd2935265:01crwdnd2935265:03crwdne2935265:0 Hyperkin Duke Teardown, D-Pad assembly removal: crwdns2935265:00crwdnd2935265:02crwdnd2935265:03crwdne2935265:0 Hyperkin Duke Teardown, D-Pad assembly removal: crwdns2935265:00crwdnd2935265:03crwdnd2935265:03crwdne2935265:0
D-Pad assembly removal
  • Remove the two screws securing the assembly to the PCB riser

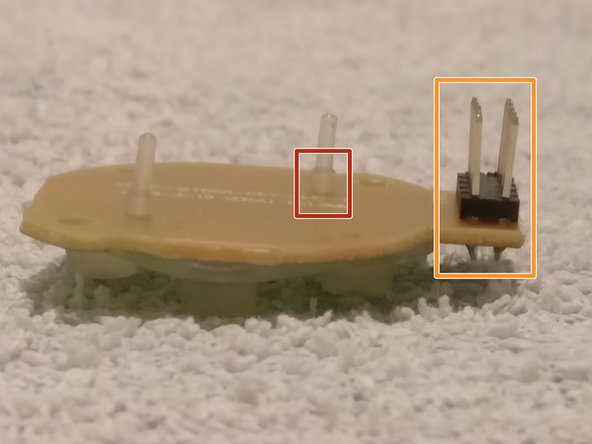
  • The D-Pad assembly makes electrical connectivity to the main PCB via the orange highlighted connector. To remove, pull D-Pad assembly away from main PCB

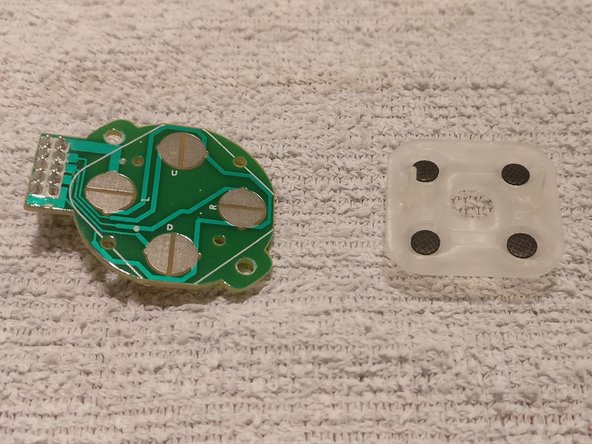
  • The conductive rubber has been press fitted to the PCB

  • To remove, very gently, as close as possible to the protruding rubber nipple, pull the conductive rubber piece away from the PCB

Retira los dos tornillos que sujetan el conjunto al elevador de PCB

El conjunto D-Pad realiza la conectividad eléctrica con la PCB principal a través del conector resaltado en naranja. Para quitarlo, tira del ensamblaje del D-Pad para alejarlo de la placa de circuito impreso principal

El caucho conductor se ha ajustado a presión a la PCB

Para quitar, con mucho cuidado, lo más cerca posible de la boquilla de goma que sobresale, tira de la pieza de goma conductora para separarla de la placa de circuito impreso.

crwdns2944171:0crwdnd2944171:0crwdnd2944171:0crwdnd2944171:0crwdne2944171:0