crwdns2933423:0crwdne2933423:0

Changement vitre écran iPhone 11 Pro Max

crwdns2936315:0crwdne2936315:0
crwdns2936317:0crwdne2936317:0
crwdns2931653:010crwdne2931653:0
iPhone 11 Pro Max Screen Glass Replacement, Bezel Attaching: crwdns2935265:00crwdnd2935265:01crwdnd2935265:03crwdne2935265:0 iPhone 11 Pro Max Screen Glass Replacement, Bezel Attaching: crwdns2935265:00crwdnd2935265:02crwdnd2935265:03crwdne2935265:0 iPhone 11 Pro Max Screen Glass Replacement, Bezel Attaching: crwdns2935265:00crwdnd2935265:03crwdnd2935265:03crwdne2935265:0
Bezel Attaching
  • How can we let up when we’re so close? So let’s keep on. First, we put a new bezel into the protection pressure mold.

  • Second, apply the bezel glue around the bracket once we fix the bracket.

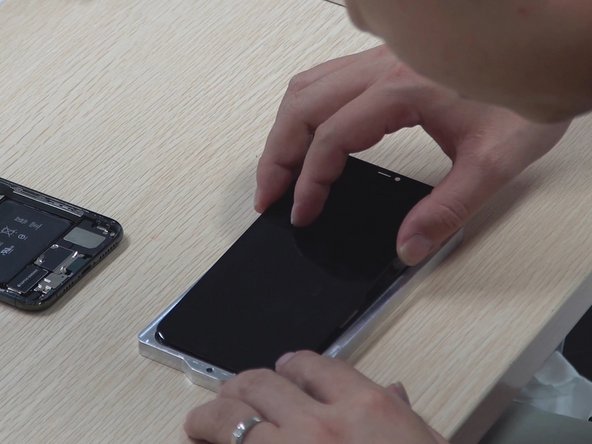
  • Third, fit the pasted LCD with the bracket. Here is a detail that should be cautioned, place the LCD from the side of flex cable position.

  • Fourth, once done, press hard around the screen with our hand to make sure the LCD is completely inside the frame.

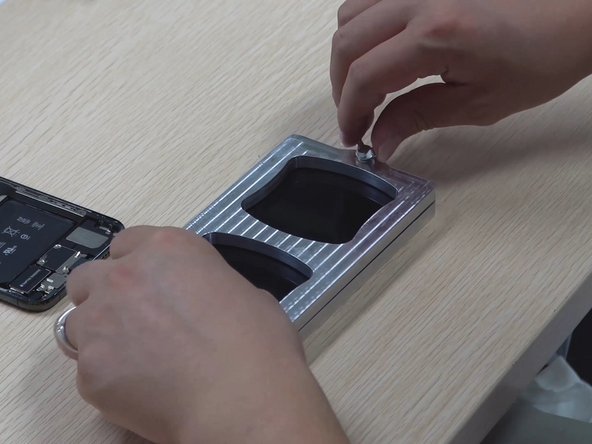
  • Fifth, cover the protection pressure mold and leave it for 30 mins.

Comment pouvons-nous abandonner quand nous sommes si près du but ? Alors continuons. Tout d'abord, nous avons placé un nouveau joint dans le moule à pression de protection.

Deuxièmement, appliquez la colle pour le joint autour du support une fois que celui-ci est fixé.

Troisièmement, placez l'écran LCD collé sur le support. Voici un détail auquel il faut faire attention : placez l'écran LCD à partir du côté de la position de la nappe.

Quatrièmement, une fois que c'est fait, appuyez fortement autour de l'écran avec votre main pour vous assurer que l'écran LCD est complètement à l'intérieur du châssis.

Cinquièmement, couvrez le moule à pression de protection et laissez-le reposer pendant 30 minutes.

crwdns2944171:0crwdnd2944171:0crwdnd2944171:0crwdnd2944171:0crwdne2944171:0