crwdns2933423:0crwdne2933423:0

Changement vitre écran iPhone 11 Pro Max

crwdns2936315:0crwdne2936315:0
crwdns2936317:0crwdne2936317:0
crwdns2931653:04crwdne2931653:0
iPhone 11 Pro Max Screen Glass Replacement, Bezel Removing Part 3: crwdns2935265:00crwdnd2935265:01crwdnd2935265:03crwdne2935265:0 iPhone 11 Pro Max Screen Glass Replacement, Bezel Removing Part 3: crwdns2935265:00crwdnd2935265:02crwdnd2935265:03crwdne2935265:0 iPhone 11 Pro Max Screen Glass Replacement, Bezel Removing Part 3: crwdns2935265:00crwdnd2935265:03crwdnd2935265:03crwdne2935265:0
Bezel Removing Part 3
  • The other is when the plastic slice is slide to the other end of the touch IC flex cable, you should use a soft plastic slice and incline it to slide back and forth.

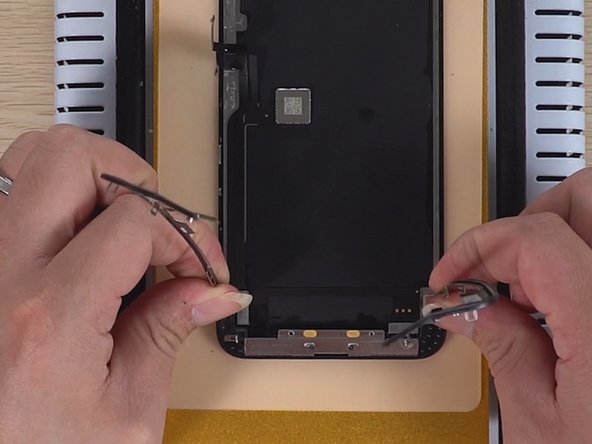
  • Well, next is the final part of this step. When detaching the bezel at the bottom area, using both hands to pull the glued bezel out with the parallel. Here the action of your hands is grasp the bezel and lift it up gently, then lower down the bezel.

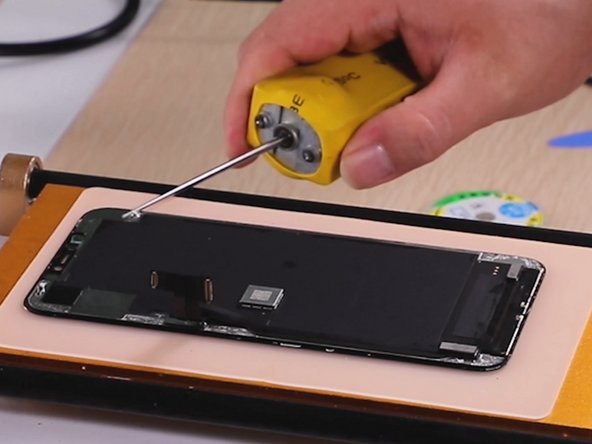
  • Then, we remove the residual glue with a glue removal device.

D'autre part, lorsque la lame plastique est glissée à l'autre extrémité de la nappe du circuit intégré tactile, il convient d'utiliser une lame en plastique souple et de l'incliner pour qu'elle glisse d'avant en arrière.

Voici la dernière partie de cette étape. Lorsque vous détachez le joint dans la partie inférieure, utilisez vos deux mains pour retirer le joint collé en parallèle. L'action de vos mains consiste à saisir le joint et à le soulever doucement, puis à l'abaisser.

Ensuite, nous enlevons la colle résiduelle à l'aide d'un dissolvant.

crwdns2944171:0crwdnd2944171:0crwdnd2944171:0crwdnd2944171:0crwdne2944171:0