crwdns2933423:0crwdne2933423:0

Sustitución del Cristal de la Pantalla del iPhone 11 Pro Max

crwdns2936315:0crwdne2936315:0
crwdns2936331:0crwdne2936331:0
crwdns2931653:03crwdne2931653:0
iPhone 11 Pro Max Screen Glass Replacement, Bezel Removing Part 2: crwdns2935265:00crwdnd2935265:01crwdnd2935265:03crwdne2935265:0 iPhone 11 Pro Max Screen Glass Replacement, Bezel Removing Part 2: crwdns2935265:00crwdnd2935265:02crwdnd2935265:03crwdne2935265:0 iPhone 11 Pro Max Screen Glass Replacement, Bezel Removing Part 2: crwdns2935265:00crwdnd2935265:03crwdnd2935265:03crwdne2935265:0
Bezel Removing Part 2
  • The other is that if the bracket is hard for you to remove, you can apply some XII glue remover on the plastic slice and insert it into the gap to scrape inner cold glue. But can’t apply too much glue remover on the flex cable and IC position.

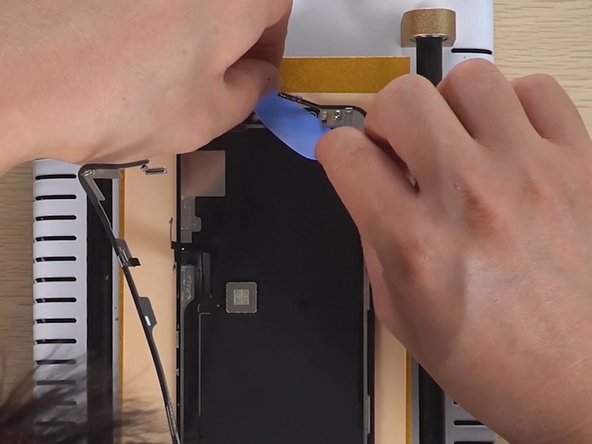
  • When we remove the bezel, you should remove one side first and stop at the flex cable position. Then remove another side and stop at the flex cable position.

  • The following is a key point to remove the bezel of flex cable position. Here we also have two things should be cautioned.

  • One is the plastic slice should be inserted from the right side of the screen where there is a display IC position and then scrape the inner cold glue.

La otra es que si te resulta difícil quitar el soporte, puedes aplicar un poco de limpiador de pegamento XII en el trozo de plástico e insertarlo en el espacio para raspar el pegamento frío interno. Pero no se puede aplicar demasiado limpiador de pegamento en el cable flexible y en la posición del IC.

Cuando retiremos el bisel, primero debes quitar un lado y detenerte en la posición del cable flexible. Luego retira otro lado y detente en la posición del cable flexible.

El siguiente es un punto clave para quitar el bisel de la posición del cable flexible. Aquí también tenemos dos cosas que deben ser advertidas.

Una es el trozo de plástico que debe insertarse desde el lado derecho de la pantalla donde hay una posición IC de visualización y luego raspar el pegamento frío interno.

crwdns2944171:0crwdnd2944171:0crwdnd2944171:0crwdnd2944171:0crwdne2944171:0