crwdns2933423:0crwdne2933423:0

Sostituzione schermo Samsung Galaxy S10e

crwdns2931527:0crwdnd2931527:0crwdnd2931527:0crwdnd2931527:0crwdne2931527:0

crwdns2935425:01crwdne2935425:0

crwdns2936315:0crwdne2936315:0
crwdns2936321:0crwdne2936321:0
crwdns2931653:01crwdne2931653:0
Samsung Galaxy S10e Screen Replacement, Slice through the screen adhesive: crwdns2935265:00crwdnd2935265:01crwdnd2935265:03crwdne2935265:0 Samsung Galaxy S10e Screen Replacement, Slice through the screen adhesive: crwdns2935265:00crwdnd2935265:02crwdnd2935265:03crwdne2935265:0 Samsung Galaxy S10e Screen Replacement, Slice through the screen adhesive: crwdns2935265:00crwdnd2935265:03crwdnd2935265:03crwdne2935265:0
Slice through the screen adhesive
  • Flip the phone over so that the display is facing up.

  • Apply a heated iOpener to the right edge of the screen for two minutes.

  • A hair dryer, heat gun, or hot plate may also be used, but be careful not to overheat the phone—the internal battery is susceptible to heat damage.

  • As you wait, note the following seams:

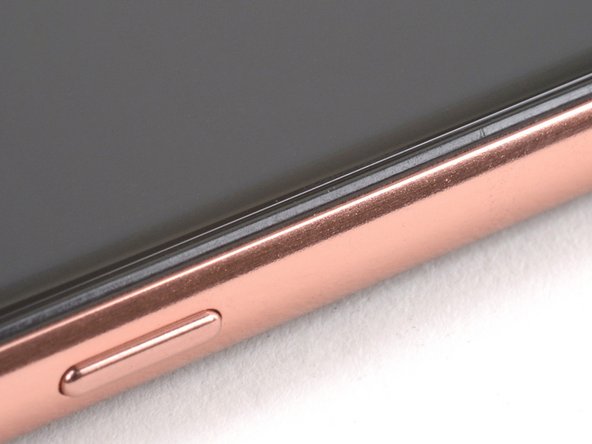
  • Display seam—this seam sits above the thin plastic bezel. You need to pry along this seam to separate the display.

  • Frame seam—this seam sits below the thin plastic bezel. Do not pry along this seam or you will damage the plastic bezel.

Gira il telefono in modo che lo schermo sia rivolto verso l'alto.

Appoggia un iOpener scaldato al bordo destro dello schermo per due minuti.

Puoi usare anche un asciugacapelli, una pistola termica o una piastra scaldante, ma stai attento a non surriscaldare il telefono: la batteria è facilmente danneggiabile dal calore eccessivo.

Mentre aspetti, segnati le seguenti fessure:

Fessura dello schermo: questa fessura è sopra il sottile bordo in plastica. Dovrai fare leva in questa fessura per separare lo schermo.

Fessura della cornice: questa fessura è sotto il sottile bordo in plastica. Non fare leva in questa fessura o danneggerai il bordo in plastica.

crwdns2944171:0crwdnd2944171:0crwdnd2944171:0crwdnd2944171:0crwdne2944171:0