crwdns2933423:0crwdne2933423:0

Samsung Galaxy Buds バッテリーの交換

crwdns2936315:0crwdne2936315:0
crwdns2936323:0crwdne2936323:0
crwdns2931653:03crwdne2931653:0
Samsung Galaxy Buds Battery Replacement: crwdns2935265:00crwdnd2935265:01crwdnd2935265:03crwdne2935265:0 Samsung Galaxy Buds Battery Replacement: crwdns2935265:00crwdnd2935265:02crwdnd2935265:03crwdne2935265:0 Samsung Galaxy Buds Battery Replacement: crwdns2935265:00crwdnd2935265:03crwdnd2935265:03crwdne2935265:0
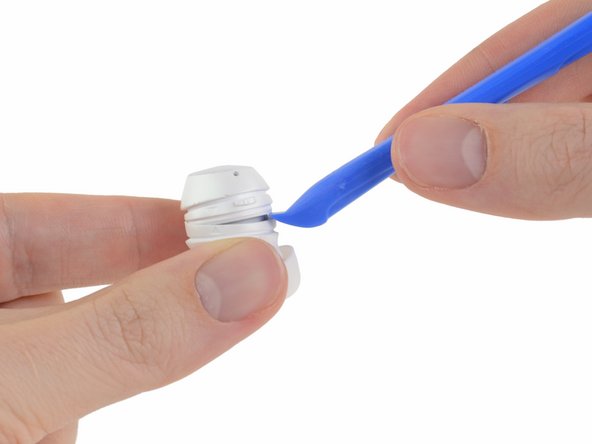
  • Once you have created a gap between the two halves of the bud, gently pry them apart with a plastic opening tool.

  • You may need to work your way around the entire earbud with the opening tool. Take your time and do your best not to deform the plastic.

  • Carefully remove the top half of the bud.

  • Be careful when pulling the halves apart! Sometimes the battery assembly gets caught in the case. If the top half of your case doesn't come out cleanly, skip this step and disconnect the cable in step 4 before separating the two halves of the bud.

  • During reassembly, line up the arrows on the two halves of the outer case, then press the halves together until they snap into place.

バズの両側間に隙間を作ったら、プラスチックの開口ツールで、隙間に差し込んでこじ開けます。

開口ツールでイヤーバズ全体周辺をこじ開けてください。時間をかけてゆっくりと作業を進めて、プラスチックを変形させないようご注意ください。

バズの上部半分を慎重に外します。

上側半分を引っ張る時はご注意ください!時々、バッテリーアセンブリがケースに引っ掛かっていることがあります。上半分がスムーズに外れない場合は、この手順をスキップして手順4のケーブルを外してください。

再組み立ての際は、上下のアウターケースにこの矢印を揃えてください。それから両側をしっかりと、カチッと音がするまで押さえます。

crwdns2944171:0crwdnd2944171:0crwdnd2944171:0crwdnd2944171:0crwdne2944171:0