crwdns2933423:0crwdne2933423:0

Microsoft Surface Pro 2 ヒートシンクの交換

crwdns2931527:0crwdnd2931527:0crwdnd2931527:0crwdnd2931527:0crwdne2931527:0

crwdns2935425:01crwdne2935425:0

crwdns2936315:0crwdne2936315:0
crwdns2936323:0crwdne2936323:0
crwdns2931653:01crwdne2931653:0
Microsoft Surface Pro 2 Heat Sinks Replacement: crwdns2935265:00crwdnd2935265:01crwdnd2935265:03crwdne2935265:0 Microsoft Surface Pro 2 Heat Sinks Replacement: crwdns2935265:00crwdnd2935265:02crwdnd2935265:03crwdne2935265:0 Microsoft Surface Pro 2 Heat Sinks Replacement: crwdns2935265:00crwdnd2935265:03crwdnd2935265:03crwdne2935265:0
  • Be sure to use gloves or tools because metal is sharp along the edge.

  • On the underside of the motherboard locate the heat shield which is located between the two fans near the top of the motherboard.

  • Remove the heat shield using an opening pick by lifting along the edges.

  • Remove all four Torx T5 screws located in each corner of the heat sink mounting frame.

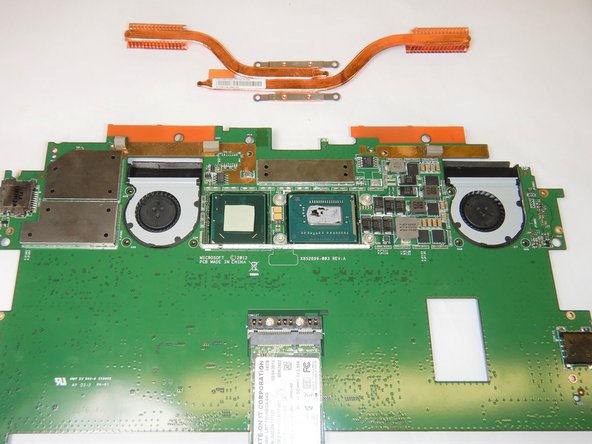
  • Carefully lift off the heat sinks from the motherboard.

  • During reinstallation of the heat sinks, be sure to clean both contact surfaces with isopropyl alcohol and reapply thermal paste.

グローブもしくはツールを使用してください。なぜなら、メタルは角に沿って鋭利だからです。

マザーボードの下面にヒートシンクがあります。マザーボード上部付近の2つのファンに挟まれています。

開口ピックを使って、端に沿って持ち上げてヒートシールドを取り出します。

ヒートシンクの固定フレームの各コーナーに留められたトルクスT5ネジを4本全て外します。

慎重にヒートシンクをマザーボードから取り出します。

ヒートシンクを再組み立てする際は、イソプロピルアルコールで表面を綺麗にクリーニングして、放熱グリスを塗布してください。

crwdns2944171:0crwdnd2944171:0crwdnd2944171:0crwdnd2944171:0crwdne2944171:0