crwdns2933423:0crwdne2933423:0

Sony Xperia Z4 LCDとデジタイザの交換

crwdns2936315:0crwdne2936315:0
crwdns2936323:0crwdne2936323:0
crwdns2931653:09crwdne2931653:0
Sony Xperia Z4 LCD & Digitizer Replacement: crwdns2935265:00crwdnd2935265:01crwdnd2935265:03crwdne2935265:0 Sony Xperia Z4 LCD & Digitizer Replacement: crwdns2935265:00crwdnd2935265:02crwdnd2935265:03crwdne2935265:0 Sony Xperia Z4 LCD & Digitizer Replacement: crwdns2935265:00crwdnd2935265:03crwdnd2935265:03crwdne2935265:0
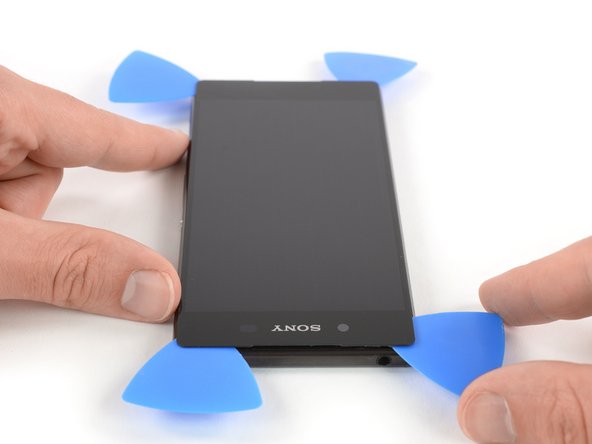
  • Insert a fourth opening pick under the bottom left edge of the screen.

  • Slide the opening pick along the midframe to loosen the adhesive under the left side of the screen.

  • Slide the opening pick around the top left corner of the screen to loosen the remaining adhesive.

  • Try not to remove the display all the way yet. The display flex cable is still threaded through the midframe.

4枚目の開口ピックをスクリーンの左下端の下に差し込みます。

開口ピックをミッドフレームに沿ってスライドし、スクリーン左側下に留められた接着剤を切開します。

開口ピックをスクリーン上部左側のコーナー周辺にスライドして、残りの接着剤を切開します。

まだこの時点で、ディスプレイを取り外さないでください。ディスプレイフレックスケーブルがミッドフレームを通して繋がっています。

crwdns2944171:0crwdnd2944171:0crwdnd2944171:0crwdnd2944171:0crwdne2944171:0