crwdns2933423:0crwdne2933423:0

Remplacement de l'écran LCD et de la vitre tactile du Sony Xperia Z4

crwdns2936315:0crwdne2936315:0
crwdns2936317:0crwdne2936317:0
crwdns2931653:09crwdne2931653:0
Sony Xperia Z4 LCD & Digitizer Replacement: crwdns2935265:00crwdnd2935265:01crwdnd2935265:03crwdne2935265:0 Sony Xperia Z4 LCD & Digitizer Replacement: crwdns2935265:00crwdnd2935265:02crwdnd2935265:03crwdne2935265:0 Sony Xperia Z4 LCD & Digitizer Replacement: crwdns2935265:00crwdnd2935265:03crwdnd2935265:03crwdne2935265:0
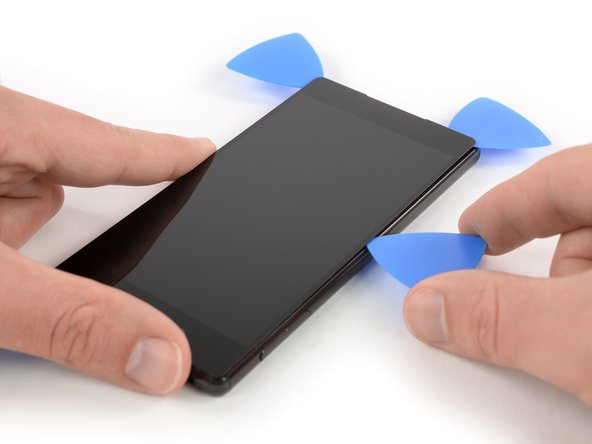
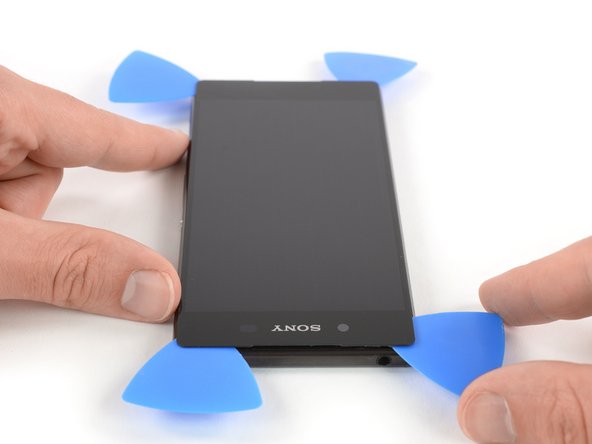
  • Insert a fourth opening pick under the bottom left edge of the screen.

  • Slide the opening pick along the midframe to loosen the adhesive under the left side of the screen.

  • Slide the opening pick around the top left corner of the screen to loosen the remaining adhesive.

  • Try not to remove the display all the way yet. The display flex cable is still threaded through the midframe.

Insérez un quatrième médiator en bas à gauche de l'écran.

Faites-le glisser le long du châssis central pour couper l'adhésif de ce côté de l'écran.

Faites ensuite le tour du coin supérieur gauche de l'écran afin de finir de trancher la colle.

N'essayez pas encore de retirer complètement l'écran. La nappe de l'écran passe toujours à travers le châssis central.

crwdns2944171:0crwdnd2944171:0crwdnd2944171:0crwdnd2944171:0crwdne2944171:0