crwdns2933423:0crwdne2933423:0

Motorola Moto E4 Plus LCDとLCDデジタイザの交換

crwdns2935425:08crwdne2935425:0

crwdns2936315:0crwdne2936315:0
crwdns2936323:0crwdne2936323:0
crwdns2931653:08crwdne2931653:0
Motorola Moto E4 Plus LCD and Digitizer Replacement, Remove the LCD and digitizer: crwdns2935265:00crwdnd2935265:01crwdnd2935265:03crwdne2935265:0 Motorola Moto E4 Plus LCD and Digitizer Replacement, Remove the LCD and digitizer: crwdns2935265:00crwdnd2935265:02crwdnd2935265:03crwdne2935265:0 Motorola Moto E4 Plus LCD and Digitizer Replacement, Remove the LCD and digitizer: crwdns2935265:00crwdnd2935265:03crwdnd2935265:03crwdne2935265:0
Remove the LCD and digitizer
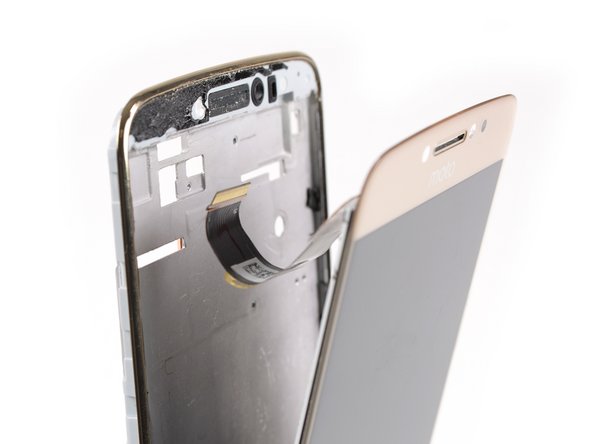
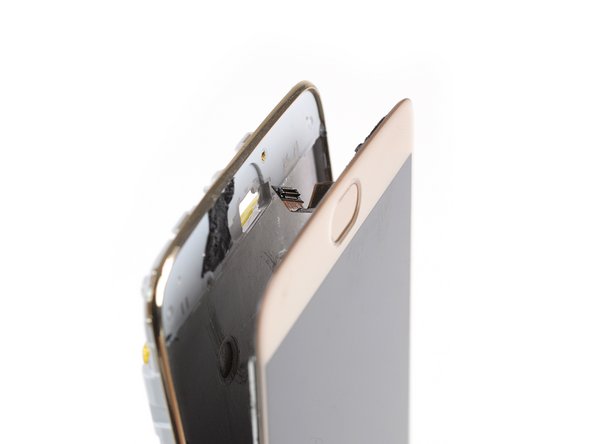
  • Carefully thread the display cable at the top and the fingerprint sensor cable on the bottom through their gaps in the midframe.

  • Remove the LCD and digitizer.

  • Remove any remaining adhesive from the midframe, and clean the glued areas with isopropyl alcohol and a lint-free cloth.

  • In case your new LCD and digitizer doesn't include the fingerprint sensor, you will need to continue with the fingerprint sensor guide to transfer it to the new LCD and digitizer.

  • Carefully compare your replacement part with your screen. You may need to transfer minor parts such as earpiece bezel to the new part.

上部のディスプレイケーブルと下部の指紋センサーケーブルを、ミッドフレームの隙間に通します。

LCDとデジタイザを外します。

高濃度のイソプロピルアルコールと糸くずの出ないリントフリーの布でミッドフレームに残った接着剤を除去して、接着部分をクリーニングします。

新しいLCDとデジタイザに指紋センサーが含まれていない場合は、指紋センサー用のガイドで作業を続けて、新しいLCDとデジタイザに指紋センサーを移す必要があります。

交換用のスクリーンに付いているパーツをよく見比べてください。イヤホンのベゼルなどの細かいパーツを新しいパーツに移植する必要があるかもしれません。

crwdns2944171:0crwdnd2944171:0crwdnd2944171:0crwdnd2944171:0crwdne2944171:0