crwdns2933423:0crwdne2933423:0

Smontaggio Minidisc Sony MZ-R700

crwdns2936315:0crwdne2936315:0
crwdns2936321:0crwdne2936321:0
crwdns2931653:06crwdne2931653:0
Sony MZ-R700 Minidisc Teardown: crwdns2935265:00crwdnd2935265:01crwdnd2935265:03crwdne2935265:0 Sony MZ-R700 Minidisc Teardown: crwdns2935265:00crwdnd2935265:02crwdnd2935265:03crwdne2935265:0 Sony MZ-R700 Minidisc Teardown: crwdns2935265:00crwdnd2935265:03crwdnd2935265:03crwdne2935265:0
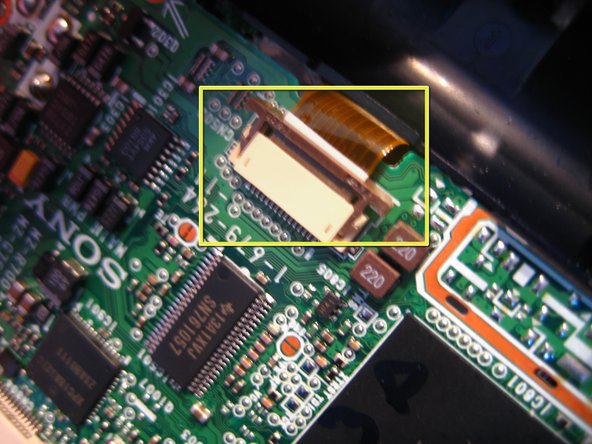
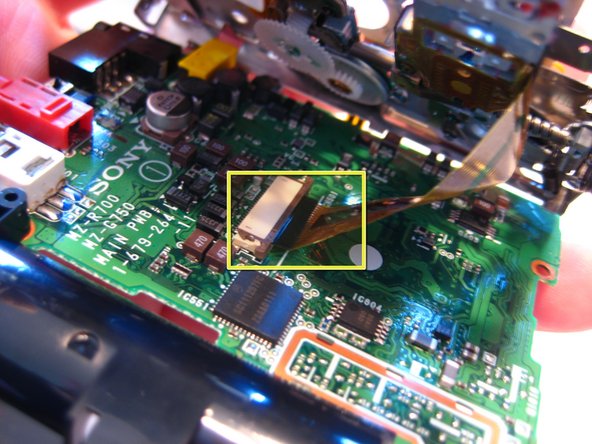
  • Next, remove the front panel from the main part of the unit. The ribbon cable connects the two. To remove, gently pull out the dark brown connector from both sides of the beige holder. This will release the ribbon cable which can then be pulled out and separated. There are three in total, two on the outside, one under the battery case and one on the lower part of the unit. The third one is on the inside of the unit.

Poi, togli il pannello frontale dalla parte principale dell'unità. Il cavo piatto li unisce. Per rimuoverlo, estrai piano il connettore marrone scuro da entrambi i lati del supporto beige. Ciò allenterà il cavo piatto che potrà essere estratto e separato.

In tutto sono 3, due al di fuori, uno sotto il case della batteria e uno nella parte inferiore dell'unità. Il terzo è dentro l'unità.

crwdns2944171:0crwdnd2944171:0crwdnd2944171:0crwdnd2944171:0crwdne2944171:0