crwdns2931527:0crwdnd2931527:0crwdnd2931527:0crwdnd2931527:0crwdne2931527:0
crwdns2935425:01crwdne2935425:0
crwdns2931653:01crwdne2931653:0

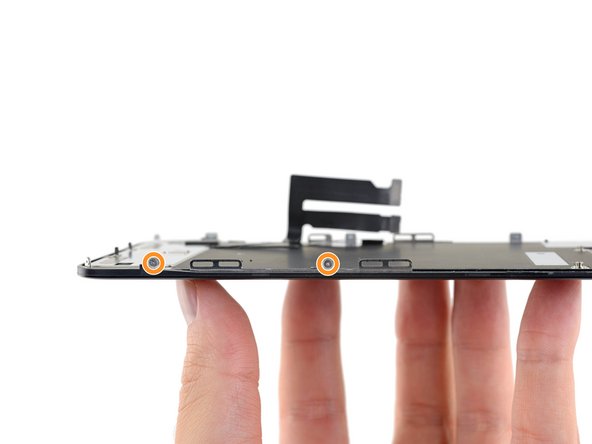


Unscrew the LCD shield plate
-
Use a Y000 driver to remove the 1.1 mm screws securing the LCD shield:
-
Three screws on the side nearest the display cables
-
Two more screws on the opposite side
crwdns2944171:0crwdnd2944171:0crwdnd2944171:0crwdnd2944171:0crwdne2944171:0