crwdns2933423:0crwdne2933423:0

Asus ROG G751JL-BB17T29 Vervanging van de bovenste behuizingsmodule

crwdns2931529:0crwdnd2931529:0crwdnd2931529:0crwdnd2931529:05crwdnd2931529:0crwdne2931529:0

crwdns2936315:0crwdne2936315:0
crwdns2936313:0crwdne2936313:0
crwdns2931653:06crwdne2931653:0
Asus ROG G751JL-BB17T29 Upper Case Assembly Replacement, Remove the upper case assembly: crwdns2935265:00crwdnd2935265:01crwdnd2935265:03crwdne2935265:0 Asus ROG G751JL-BB17T29 Upper Case Assembly Replacement, Remove the upper case assembly: crwdns2935265:00crwdnd2935265:02crwdnd2935265:03crwdne2935265:0 Asus ROG G751JL-BB17T29 Upper Case Assembly Replacement, Remove the upper case assembly: crwdns2935265:00crwdnd2935265:03crwdnd2935265:03crwdne2935265:0
Remove the upper case assembly
  • Open the laptop's display to a 90° angle.

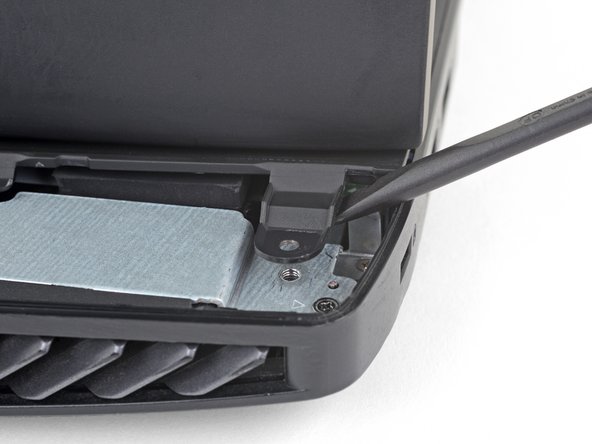
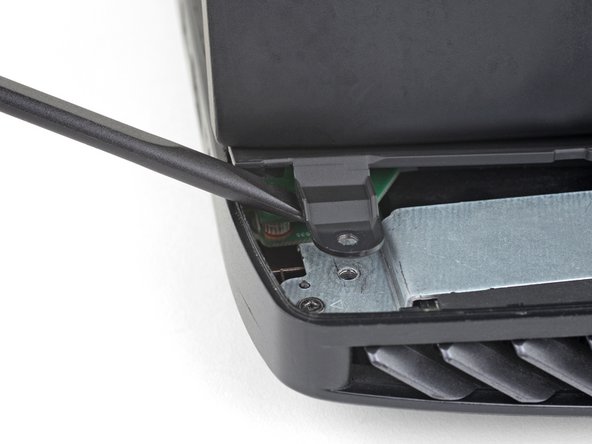
  • Use a spudger to pry against one of the screw tabs on the back of the upper case assembly.

  • Make sure to pry as close as possible to the base of the tab to avoid damaging the tab.

  • Repeat this procedure with the other tab.

  • The upper case assembly is held in place by small clips around its edges. In this step, pry each tab up until you feel the nearest clips release.

Op het scherm van de laptop tot een hoek van ongeveer 90°.

Gebruik een spudger om een van de uitstulpingen aan de achterkant van de bovenste behuizingsmodule, die de schroefopeningen bevatten, omhoog te duwen.

Zorg dat je zo dichtbij mogelijk bij de voet van de uitstulping wrikt om zo te voorkomen dat je de uitstulping zelf beschadigt.

Herhaal deze procedure bij de andere uitstulping.

De bovenste behuizingsmodule wordt op z'n plek gehouden door kleine klemmen rondom de zijkanten. Wrik de module op een aantal plekken omhoog totdat je de klemmen los voelt klikken.

crwdns2944171:0crwdnd2944171:0crwdnd2944171:0crwdnd2944171:0crwdne2944171:0