crwdns2935425:032crwdne2935425:0
crwdns2931653:032crwdne2931653:0


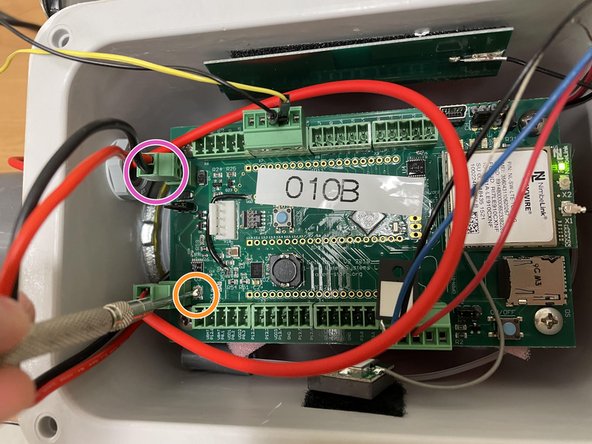


Adjusting Solar Charger Potentiometer
-
Obtain USB power supply, plug into a laptop, and set output to 5.9V
-
Plug in the green terminal block from the power supply into the Open-Storm board solar port.
-
Confirm the solar charge LED is off.
-
Plug in a dead battery to the battery port. This step will not work with a charged battery
-
CAREFULLY turn the silver potentiometer next to the charge controller IC with a small flathead screw driver until the charge light turns on.
crwdns2944171:0crwdnd2944171:0crwdnd2944171:0crwdnd2944171:0crwdne2944171:0