crwdns2933423:0crwdne2933423:0

Sostituzione gruppo schermo Google Pixel 3

crwdns2935425:07crwdne2935425:0

crwdns2936315:0crwdne2936315:0
crwdns2936321:0crwdne2936321:0
crwdns2931653:07crwdne2931653:0
Google Pixel 3 Display Assembly Replacement, Remove the display assembly: crwdns2935265:00crwdnd2935265:01crwdnd2935265:03crwdne2935265:0 Google Pixel 3 Display Assembly Replacement, Remove the display assembly: crwdns2935265:00crwdnd2935265:02crwdnd2935265:03crwdne2935265:0 Google Pixel 3 Display Assembly Replacement, Remove the display assembly: crwdns2935265:00crwdnd2935265:03crwdnd2935265:03crwdne2935265:0
Remove the display assembly
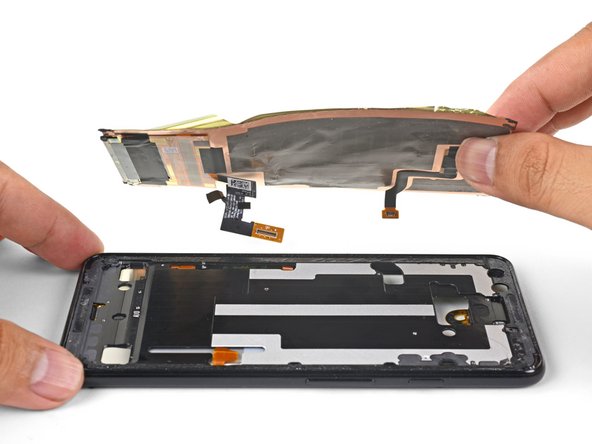
  • Thread the screen cable and digitizer cable out of their cutouts, then remove the display.

  • To install a replacement display assembly:

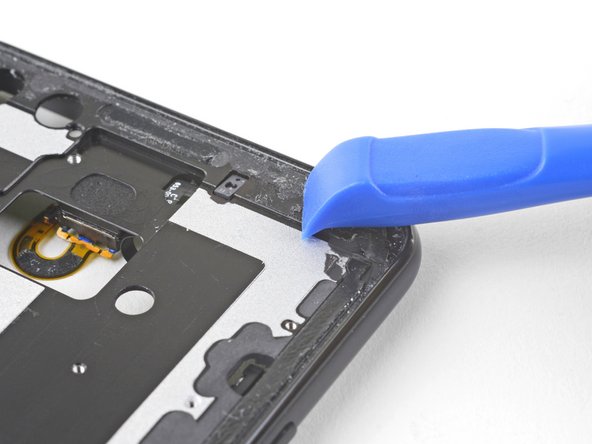
  • Clean all adhesive residue from the phone frame. Adhesive that's left behind may apply uneven pressure against the replacement screen and potentially damage it.

  • Apply a pre-cut adhesive, or double-sided tape to the phone frame's perimeter.

  • Peel all plastic liners from the back of the replacement screen to expose the adhesive.

  • Carefully thread the screen cable and the digitizer cable through the phone frame's cutouts.

  • Lay the screen onto the frame and place some books on top for an hour to help the screen adhesive bond to the frame.

  • During the boot-up process after reassembly, the screen will go through a calibration sequence. Do not touch the screen during this process, as it could result in improper touch calibration and create touch issues.

Fai passare il cavo dello schermo e quello del digitizer fuori dai rispettivi intagli, quindi rimuovi lo schermo

Per applicare un gruppo dello schermo sostitutivo:

Pulisci ogni traccia di adesivo dalla scocca del telefono. La colla rimasta potrebbe portare a una pressione non uniforme sullo schermo sostitutivo, che quindi potrebbe danneggiarsi.

Applica sul perimetro della scocca del telefono dell'adesivo pretagliato o del nastro biadesivo.

Stacca eventuali protezioni dal retro dello schermo sostitutivo per esporre l'adesivo.

Fai passare con attenzione il cavo dello schermo e il cavo del digitizer attraverso i rispettivi passaggi nella scocca del telefono.

Disponi lo schermo sopra la scocca e sistema alcuni libri sopra di esso per un'ora per favorire l'incollaggio tra lo schermo e la scocca.

Durante la procedura di avvio dopo il rimontaggio, lo schermo attraverserà una fase di calibratura. Non toccare lo schermo durante questa fase, in quanto potrebbe causare una calibrazione errata del touch e generare problemi.

crwdns2944171:0crwdnd2944171:0crwdnd2944171:0crwdnd2944171:0crwdne2944171:0