crwdns2933423:0crwdne2933423:0

Remplacement du connecteur d’alimentation du Sony Vaio VPCF126FM

crwdns2936315:0crwdne2936315:0
crwdns2936317:0crwdne2936317:0
crwdns2931653:05crwdne2931653:0
Sony Vaio VPCF126FM DC Charger Jack Replacement: crwdns2935265:00crwdnd2935265:01crwdnd2935265:02crwdne2935265:0 Sony Vaio VPCF126FM DC Charger Jack Replacement: crwdns2935265:00crwdnd2935265:02crwdnd2935265:02crwdne2935265:0
  • Now that the old wobbly jack is out, pull the rest of the wires through the hole in the frame.

  • Then feed the wires of the new jack through that same hole.

  • On my replacement, there was a ferrite bead halfway along the wire, wrapped in shrinkable tube insulation, which together was too large to feed through the case. I had to carefully snip away the tube, feed through the wires, and slip on a fresh piece of 10mm shrink tube from the other side.

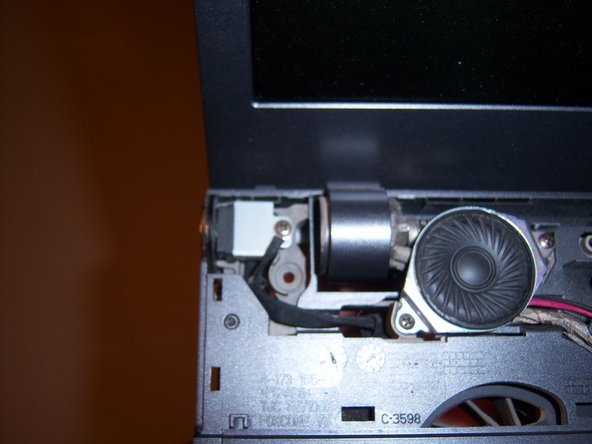
  • The new jack should go in easier than the old one came out. Make sure it is aligned the same as the old one with the wires going away from the screen, and snap it in.

  • Then put that metal cover back over it and place the short wire with the ring terminal on top of that, then re-install the screw through that connector and tighten it down.

  • Beware: On my replacement jack, the metal cover was so tight to the positive wire (nearest the top of the jack) that it shorted out after reassembly (the green light on the power brick cut out as soon as I plugged it in).

  • I used needle nose pliers to open out the right angle of the metal cover, away from the wire, and added a small piece of insulating tape under it to prevent shorting.

Maintenant que cet ancien connecteur d’alimentation instable est retiré, faites passer le reste des fils à travers le trou du châssis.

Puis faites passer les fils du nouveau collecteur d’alimentation à travers ce même trou.

Sur ma pièce de rechange, il y avait une ferrite au milieu du fil emballé dans une gaine thermorétractible, elle était trop large pour passer à travers le trou du châssis. J’ai dû découper prudemment la gaine, passer les fils, glisser un nouveau morceau de gaine de 10 mm de l’autre côté.

Le nouveau connecteur d’alimentation devrait s’insérer aussi facilement que l’ancien a été retiré. Assurez-vous qu’il est aligné de la même façon que l’ancien avec les fils qui passent loin de l’écran, puis installez-le.

Puis remettez le cache métallique par-dessus et placez le fil court avec le connecteur circulaire sur le dessus du connecteur d'alimentation, et revissez la vis sur le connecteur pour qu’il soit maintenu.

Attention : sur ma pièce de rechange, le cache en métal était tellement proche du fil positif (près du haut du connecteur d’alimentation) qu’il était en court-circuit après remontage (la lumière verte sur le témoin d’alimentation s’est éteinte aussitôt que je l’ai branché).

J’ai utilisé une pince fine pour soulever la partie en angle droit du couvercle métallique, loin du fil, et j’ai ajouté un petit morceau de ruban isolant en dessous pour éviter les courts-circuits.

crwdns2944171:0crwdnd2944171:0crwdnd2944171:0crwdnd2944171:0crwdne2944171:0