crwdns2933423:0crwdne2933423:0

MacBook Pro 13" Touch Bar eind 2016 vervanging van de batterij

crwdns2931527:0crwdnd2931527:0crwdnd2931527:0crwdnd2931527:0crwdne2931527:0

crwdns2935425:022crwdne2935425:0

crwdns2936315:0crwdne2936315:0
crwdns2936313:0crwdne2936313:0
crwdns2931653:022crwdne2931653:0
MacBook Pro 13" Touch Bar Late 2016 Battery Replacement, Battery installation: crwdns2935265:00crwdnd2935265:01crwdnd2935265:03crwdne2935265:0 MacBook Pro 13" Touch Bar Late 2016 Battery Replacement, Battery installation: crwdns2935265:00crwdnd2935265:02crwdnd2935265:03crwdne2935265:0 MacBook Pro 13" Touch Bar Late 2016 Battery Replacement, Battery installation: crwdns2935265:00crwdnd2935265:03crwdnd2935265:03crwdne2935265:0
Battery installation
  • Double-check the fit and alignment of your new battery before sticking it down.

  • Be mindful of the battery data cable and make sure it doesn't get pinched or trapped under the battery board.

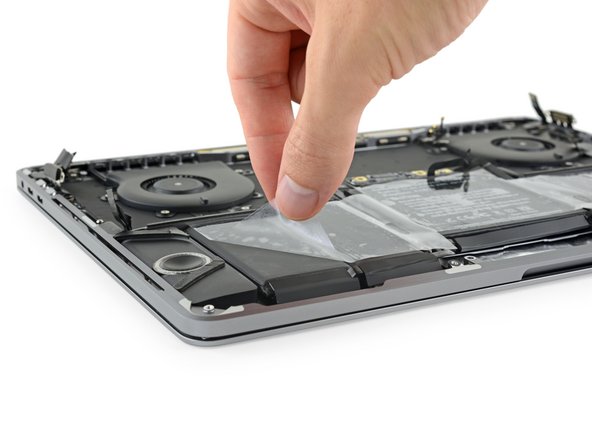
  • If your battery came with adhesive pre-installed on the bottom, flip it over and carefully peel away the liner to expose the adhesive. If your battery did not come with adhesive, apply a thin double-sided adhesive tape such as Tesa 61395 to keep your battery in place.

  • Carefully position the battery and set it into place.

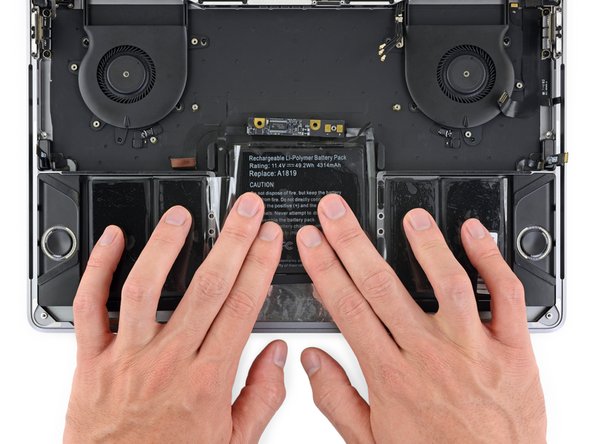
  • Press and hold each cell firmly for 5-10 seconds to secure it to the lower case.

Dubbel-check of je nieuwe batterij goed past voordat je deze vastzet.

Wees attent op de positie van de datakabel van de batterij en zorg dat deze niet wordt afgekneld of klem komt te zitten onder het batterijbord.

Als je batterij is geleverd met vooraf vastgemaakte kleefstrips aan de onderkant, draai je batterij dan om en haal de beschermlaag eraf om de kleefstrip klaar te maken voor gebruik. Als je batterij zonder kleefstrip is gekomen, gebruik je een beetje dubbelzijdige tape, zoals Tesa 61395, om je batterij op z'n plek te houden.

Positioneer je batterij met zorg en duw deze op z'n plek.

Druk iedere batterijcel stevig vast en houd er voor 5-10 seconden druk op om ze te bevestigen aan de onderste behuizing.

crwdns2944171:0crwdnd2944171:0crwdnd2944171:0crwdnd2944171:0crwdne2944171:0