crwdns2933423:0crwdne2933423:0

Panasonic Lumix DMC-G7 Mainboard Replacement

crwdns2931529:0crwdnd2931529:0crwdnd2931529:0crwdnd2931529:03crwdnd2931529:0crwdne2931529:0

crwdns2935425:09crwdne2935425:0

crwdns2936315:0crwdne2936315:0
crwdns2936325:0crwdne2936325:0
crwdns2931653:09crwdne2931653:0
Panasonic Lumix DMC-G7 Mainboard Replacement: crwdns2935265:00crwdnd2935265:01crwdnd2935265:03crwdne2935265:0 Panasonic Lumix DMC-G7 Mainboard Replacement: crwdns2935265:00crwdnd2935265:02crwdnd2935265:03crwdne2935265:0 Panasonic Lumix DMC-G7 Mainboard Replacement: crwdns2935265:00crwdnd2935265:03crwdnd2935265:03crwdne2935265:0
  • Remove the 4 indicated red 3.0mm long screws from the corners of mainboard using a Phillips PH0 screwdriver.

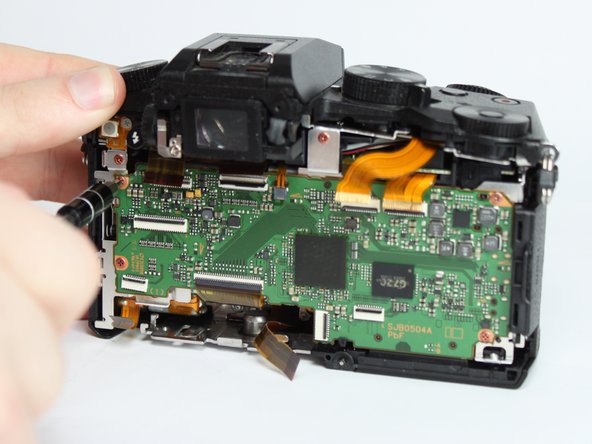
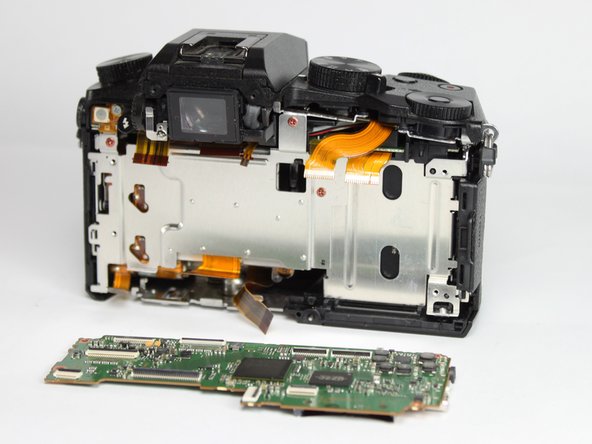
  • With the eyepiece facing away from you, pull up on the main PCB from the left side and then pull it away from the chassis.

  • There is a plastic locking tab on the bottom of the camera that holds the mainboard PCB.

  • A replacement mainboard can be purchased from AliExpress here

crwdns2935429:0crwdne2935429:0

crwdns2935429:0crwdne2935429:0

crwdns2935429:0crwdne2935429:0

crwdns2935429:0crwdne2935429:0

crwdns2944171:0crwdnd2944171:0crwdnd2944171:0crwdnd2944171:0crwdne2944171:0