crwdns2933423:0crwdne2933423:0

iPad Pro 10.5 バッテリー交換

crwdns2936315:0crwdne2936315:0
crwdns2936323:0crwdne2936323:0
crwdns2931653:09crwdne2931653:0
iPad Pro 10.5" Battery Replacement: crwdns2935265:00crwdnd2935265:01crwdnd2935265:03crwdne2935265:0 iPad Pro 10.5" Battery Replacement: crwdns2935265:00crwdnd2935265:02crwdnd2935265:03crwdne2935265:0 iPad Pro 10.5" Battery Replacement: crwdns2935265:00crwdnd2935265:03crwdnd2935265:03crwdne2935265:0
  • In the following steps you'll be very carefully prying up the logic board. The place to lift it is very tight. Avoid damage to the left and right interconnect and antenna cables, by making sure they don't get caught by the logic board when prying it up.

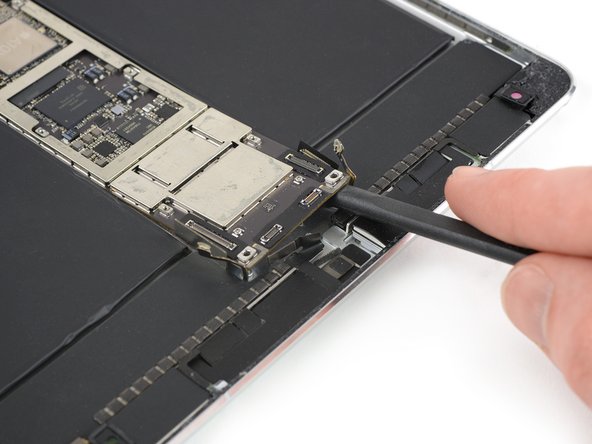
  • Insert the flat end of a spudger between the logic board and the rear case of the iPad.

  • Use the spudger to slowly pry up the right side of the logic board.

  • If the adhesive is too strong to pry up the logic board, apply some additional solvent and give it time to penetrate.

  • Pry up the left side of the logic board until you can get a good grip.

  • Don't try to remove the logic board all the way! It is still connected to the bottom area of the iPad.

次の手順では、ロジックボードを持ち上げる場所は非常に狭いため、とても慎重に開きます。左右のインターコネクトケーブルとアンテナケーブルは、ロジックボードを開けるときに引っかからないようにして、損傷を避けるようにします。

ロジックボードとiPadのリアケースの間に、スパッジャの平らな端を差し込みます。

ロジックボードの右側をスパッジャでゆっくり開きます。

接着剤が強すぎてロジックボードをこじ開けられない場合は、溶剤を追加で塗布し、数分間浸透させてください。

ロジックボードの左側を、しっかりつかめるようになるまで開きます。

ロジックボードはまだiPadの底部に接続されているので、完全に取り外さないでください。

crwdns2944171:0crwdnd2944171:0crwdnd2944171:0crwdnd2944171:0crwdne2944171:0