crwdns2935425:04crwdne2935425:0
crwdns2931653:04crwdne2931653:0


-
Remove the single screw on the right side of the LCD Board. (labeled in Yellow, We will remove the rest later in the teardown.
-
There are three screws holding the Tray down to the bottom of the unit- Remove them
-
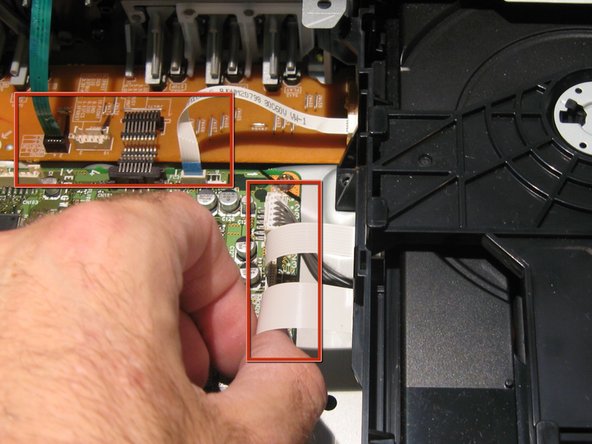
Gently remove all connectors (6) in the image highlighted with red boxes
-
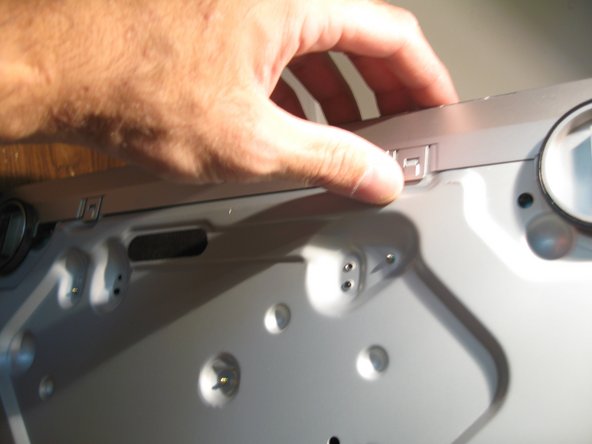
Turn the unit over. release the two clips on the underside and then the two on either side of the unit in order to Remove the Front Face.
crwdns2944171:0crwdnd2944171:0crwdnd2944171:0crwdnd2944171:0crwdne2944171:0