crwdns2935425:06crwdne2935425:0
crwdns2931653:06crwdne2931653:0


-
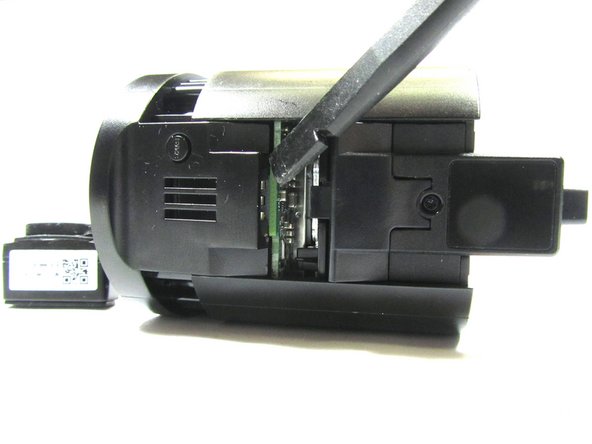
With the Camera Face Plate removed, use the Spudger Tool to pry the Camera Assembly away from the Camera Body
-
Once the Camera Assembly comes loose from the Camera Body, use the Spudger Tool to pry against the two plastic tabs on the bottom of the Camera Assembly that hold the Camera Assembly to the Camera Body PCB (Main PCB)
-
Pull the Camera Assembly away from the Assembly Body
-
The Camera Assembly is held in place by Zero Insertion Force Connectors to the Main PCB in the Camera Body
crwdns2944171:0crwdnd2944171:0crwdnd2944171:0crwdnd2944171:0crwdne2944171:0