crwdns2933423:0crwdne2933423:0

Sustitución del Termostato de Corte de la Lavadora Secadora Heavyduty Whirlpool Stacked

crwdns2935425:01crwdne2935425:0

crwdns2936315:0crwdne2936315:0
crwdns2936331:0crwdne2936331:0
crwdns2931653:01crwdne2931653:0
Heavyduty Whirlpool Stacked Washer Dryer Thermostat cut off Replacement: crwdns2935265:00crwdnd2935265:01crwdnd2935265:03crwdne2935265:0 Heavyduty Whirlpool Stacked Washer Dryer Thermostat cut off Replacement: crwdns2935265:00crwdnd2935265:02crwdnd2935265:03crwdne2935265:0 Heavyduty Whirlpool Stacked Washer Dryer Thermostat cut off Replacement: crwdns2935265:00crwdnd2935265:03crwdnd2935265:03crwdne2935265:0
  • First of all we need to make room behind the dryer. To do this a dolly is recommended since its about 250lbs and can definitely scratch the floor if drug. Pull the machine out slowly until there is room to fit behind and still have arm space.

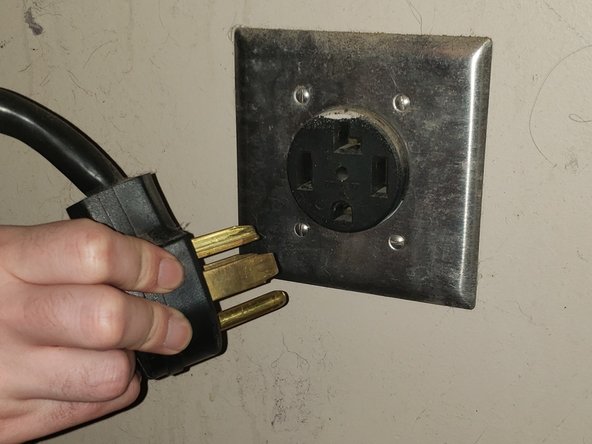
  • The dryer vent, hot/cold water and drainage pipes can remain attached. But for safety unplugging the machine is mandatory. The plug is big and may require a little extra force to remove.

En primer lugar, debemos hacer espacio detrás de la secadora. Para hacer esto, se recomienda una plataforma rodante ya que pesa alrededor de 250 libras y definitivamente puede rayar el piso si se arrastra. Saca la máquina lentamente hasta que quede espacio detrás y aún tengas espacio para los brazos.

Las tuberías de ventilación de la secadora, agua fría/caliente y desagüe pueden permanecer conectadas. Pero por seguridad es obligatorio desenchufar la máquina. El tapón es grande y puede requerir un poco más de fuerza para quitarlo.

crwdns2944171:0crwdnd2944171:0crwdnd2944171:0crwdnd2944171:0crwdne2944171:0