crwdns2933423:0crwdne2933423:0

Nexus 5X LCDLCD スクリーンとデジタイザアセンブリの交換

crwdns2936315:0crwdne2936315:0
crwdns2936323:0crwdne2936323:0
crwdns2931653:03crwdne2931653:0
Nexus 5X Screen Assembly Replacement: crwdns2935265:00crwdnd2935265:01crwdnd2935265:03crwdne2935265:0 Nexus 5X Screen Assembly Replacement: crwdns2935265:00crwdnd2935265:02crwdnd2935265:03crwdne2935265:0 Nexus 5X Screen Assembly Replacement: crwdns2935265:00crwdnd2935265:03crwdnd2935265:03crwdne2935265:0
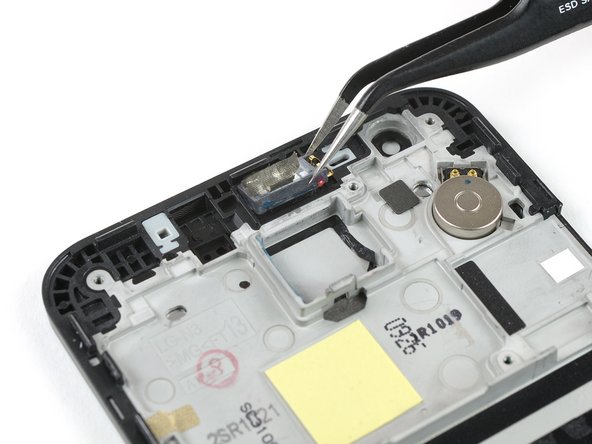
  • Use a pair of tweezers to gently peel of the tape that holds down the earpiece speaker.

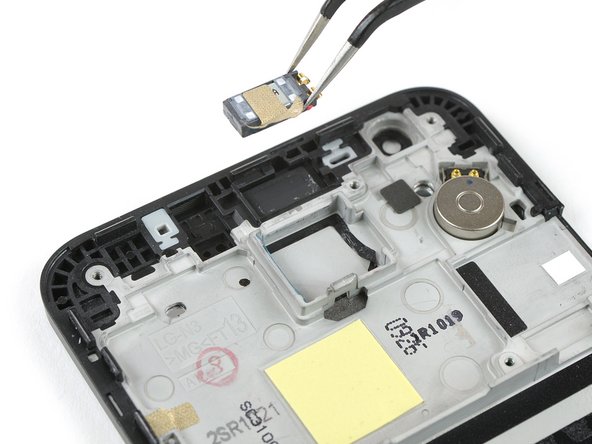
  • Use the tweezers to carefully lift the earpiece speaker out of its gasket.

  • In case you're having trouble removing the earpiece speaker you can use an iOpener to loosen the adhesive beneath.

  • Remove the earpiece speaker.

  • Note the earpiece speaker orientation. Be sure to reinstall it the same direction.

ピンセットを使って、イヤピーススピーカーを固定しているテープをゆっくりと剥がします。

ピンセットを使って、ガスケットから慎重にイヤピーススピーカーを持ち上げます。

イヤピーススピーカーを取り外せない場合は、再度iOpenerを温めて、下の接着剤を緩めます。

イヤピーススピーカーを外します。

イヤピーススピーカーの装着方向にご注意ください。正しい方向にインストールしているか確認してください。

crwdns2944171:0crwdnd2944171:0crwdnd2944171:0crwdnd2944171:0crwdne2944171:0