crwdns2933423:0crwdne2933423:0

iPad Mini CDMAのフロントパネルの交換

crwdns2931529:0crwdnd2931529:0crwdnd2931529:0crwdnd2931529:042crwdnd2931529:0crwdne2931529:0

crwdns2936315:0crwdne2936315:0
crwdns2936323:0crwdne2936323:0
crwdns2931653:06crwdne2931653:0
iPad Mini CDMA Front Panel Replacement: crwdns2935265:00crwdnd2935265:01crwdnd2935265:03crwdne2935265:0 iPad Mini CDMA Front Panel Replacement: crwdns2935265:00crwdnd2935265:02crwdnd2935265:03crwdne2935265:0 iPad Mini CDMA Front Panel Replacement: crwdns2935265:00crwdnd2935265:03crwdnd2935265:03crwdne2935265:0
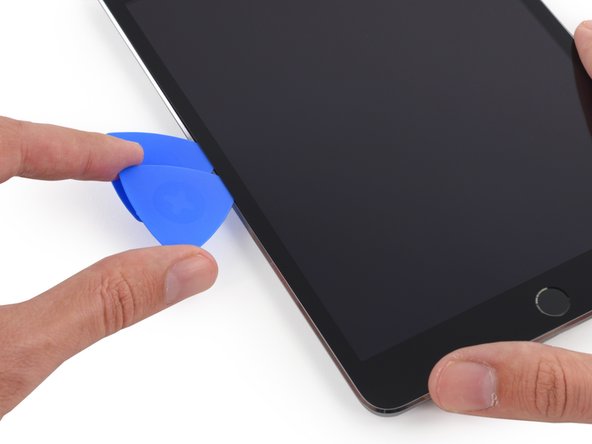
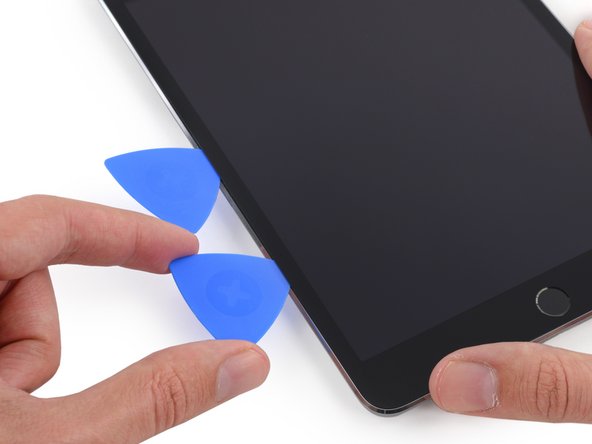
  • Place a second opening pick alongside the first and slide the pick down along the edge of the iPad, releasing the adhesive as you go.

  • Throughout the rest of the procedure, if you encounter significant resistance to sliding picks beneath the glass, stop and reheat the section you're working on. Forcing the picks risks cracking the glass.

2番目の開口ピックを最初のピックの隣に差し込み、iPadの端に沿ってピックを使いながら接着剤を剥がし、下方にスライドさせます。

以下の手順全てに渡って、ガラスの下でピックをスライドさせる際にかなりの抵抗力を感じたら、作業を止めて、該当箇所を再度温めてください。力ずくでピックをスライドさせるとガラスにひびが入ってしまいます。

crwdns2944171:0crwdnd2944171:0crwdnd2944171:0crwdnd2944171:0crwdne2944171:0