crwdns2933423:0crwdne2933423:0

Remplacement de la coque du Sony Handycam FDR-AX33

crwdns2931529:0crwdnd2931529:0crwdnd2931529:0crwdnd2931529:05crwdnd2931529:0crwdne2931529:0

crwdns2935425:08crwdne2935425:0

crwdns2936315:0crwdne2936315:0
crwdns2936317:0crwdne2936317:0
crwdns2931653:08crwdne2931653:0
Sony Handycam FDR-AX33 Panel Replacement: crwdns2935265:00crwdnd2935265:01crwdnd2935265:03crwdne2935265:0 Sony Handycam FDR-AX33 Panel Replacement: crwdns2935265:00crwdnd2935265:02crwdnd2935265:03crwdne2935265:0 Sony Handycam FDR-AX33 Panel Replacement: crwdns2935265:00crwdnd2935265:03crwdnd2935265:03crwdne2935265:0
  • Remove the 4 mm Phillips #00 screw above and to the right of the battery slot.

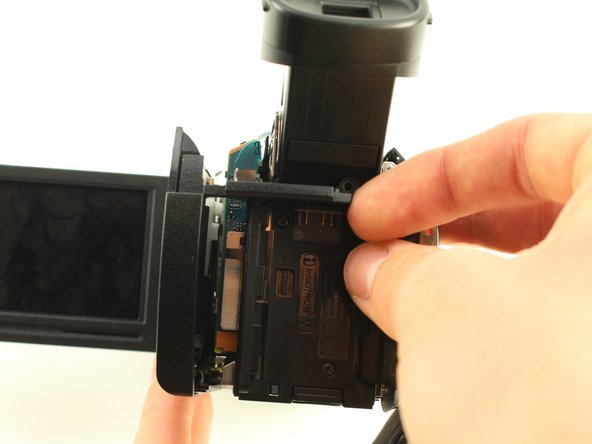
  • Pry the left panel out at an angle by pushing the plastic slat between the battery slot and the eyepiece.

  • Wiggle the left panel and pull it out gently.

  • The left panel can be hard to remove so make sure to apply a good amount of force, but be cautious to not harm yourself or the device.

Retirez la vis Phillips # 00 de 4 mm au-dessus et à droite du logement de la batterie.

Faites levier sur le panneau gauche en faisant un angle en poussant la latte en plastique entre la fente de la batterie et l'oculaire.

Remuez le panneau gauche et retirez-le doucement.

Le panneau de gauche peut être difficile à retirer, alors assurez-vous d'appliquer une bonne quantité de force, mais faites attention de ne pas vous blesser ou blesser l'appareil.

crwdns2944171:0crwdnd2944171:0crwdnd2944171:0crwdnd2944171:0crwdne2944171:0