crwdns2933423:0crwdne2933423:0

Zanco Tiny T1の分解

crwdns2936315:0crwdne2936315:0
crwdns2936323:0crwdne2936323:0
crwdns2931653:04crwdne2931653:0
Zanco Tiny T1 Teardown: crwdns2935265:00crwdnd2935265:01crwdnd2935265:03crwdne2935265:0 Zanco Tiny T1 Teardown: crwdns2935265:00crwdnd2935265:02crwdnd2935265:03crwdne2935265:0 Zanco Tiny T1 Teardown: crwdns2935265:00crwdnd2935265:03crwdnd2935265:03crwdne2935265:0
  • Opening a phone of this scale requires specialty tools. Fortunately, iFixit has got it covered.

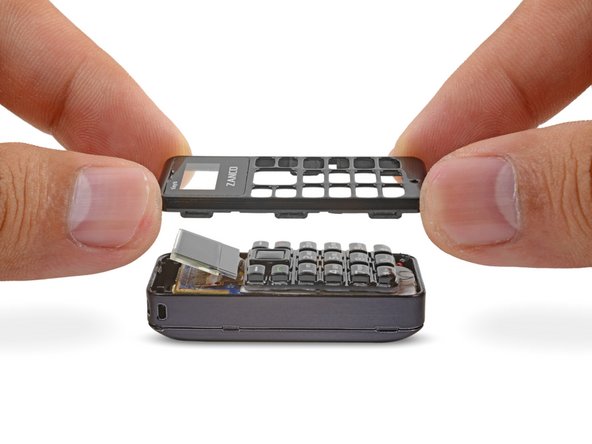
  • Despite its retro aesthetic, this opening procedure is far from obsolete. Some micro spudger action frees up the front clips, and the top plastic plate is free!

  • Unlike with some phones, we encounter no proprietary screws here.

  • We move the keypad aside and find the button pad soldered to the board beneath.

  • To supply backlight to the keypad, two white adhesive pads diffuse light from four surface-mounted LEDs underneath.

このサイズのデバイスを開口するには、特別なツールが必要です。なんと、iFixitにはこんなサイズのツールも揃っているのです。

このレトロな形状にも関わらず、開口方法はとても簡単です。マイクロスパッジャーがフロントクリップを解放し、上部のプラスチックプレートが外れます!

他のフォンとは違い、ここにはメーカー独自のネジなんて使われていません。

キーパッドを取り出すと、ボタンパッドが下のボードに半田付けされています。

キーパッドにバックライトを供給するため、2つの白い接着パッドが、その下に付けられた4つの表面実装LEDからの光を拡散しています。

crwdns2944171:0crwdnd2944171:0crwdnd2944171:0crwdnd2944171:0crwdne2944171:0