crwdns2933423:0crwdne2933423:0

iPod Touch 第5世代のフロントパネルの交換

crwdns2931529:0crwdnd2931529:0crwdnd2931529:0crwdnd2931529:021crwdnd2931529:0crwdne2931529:0

crwdns2936315:0crwdne2936315:0
crwdns2936323:0crwdne2936323:0
crwdns2931653:05crwdne2931653:0
iPod Touch 5th Generation Front Panel Replacement: crwdns2935265:00crwdnd2935265:01crwdnd2935265:03crwdne2935265:0 iPod Touch 5th Generation Front Panel Replacement: crwdns2935265:00crwdnd2935265:02crwdnd2935265:03crwdne2935265:0 iPod Touch 5th Generation Front Panel Replacement: crwdns2935265:00crwdnd2935265:03crwdnd2935265:03crwdne2935265:0
  • In the following steps, you will be loosening and freeing the plastic frame that surrounds the screen. It is connected to the rear case with several clips.

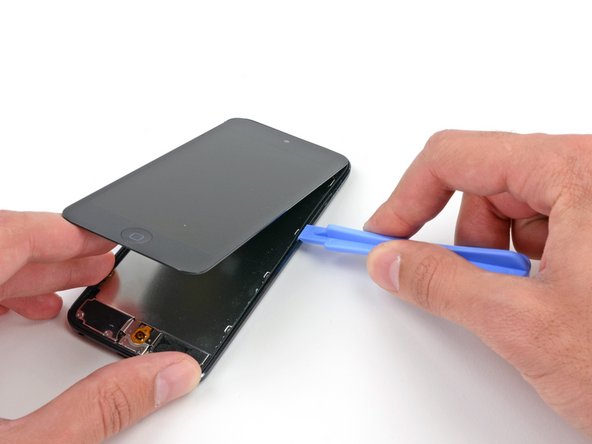
  • Starting at the top right of the device, insert a plastic opening tool into the gap between the plastic frame and the aluminum rear case.

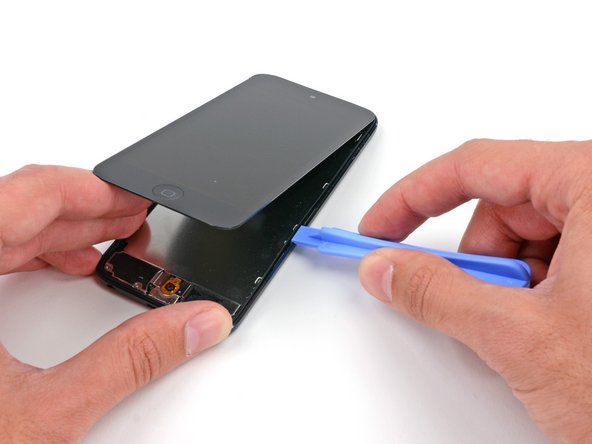
  • Slide the tool down this crack, loosening the frame from the case.

次の手順では、画面を囲むプラスチックフレームを緩めて解放します。 いくつかのクリップでリアケースに接続されています。

デバイス右上のプラスチックフレームとアルミ製リアケースの間に開口ツールを差し込みます。

隙間をスライドさせながら、ケースからフレームを外します。

crwdns2944171:0crwdnd2944171:0crwdnd2944171:0crwdnd2944171:0crwdne2944171:0