crwdns2933423:0crwdne2933423:0

Sony VAIO PCG-61411L Teardown

crwdns2936315:0crwdne2936315:0
crwdns2936323:0crwdne2936323:0
crwdns2931653:06crwdne2931653:0
Sony VAIO PCG-61411L Teardown: crwdns2935265:00crwdnd2935265:01crwdnd2935265:03crwdne2935265:0 Sony VAIO PCG-61411L Teardown: crwdns2935265:00crwdnd2935265:02crwdnd2935265:03crwdne2935265:0 Sony VAIO PCG-61411L Teardown: crwdns2935265:00crwdnd2935265:03crwdnd2935265:03crwdne2935265:0
  • Remove the 15 screws indicated by red circles setting them aside in their own container

  • Remove the 3 screws indicated by yellow circles setting them aside in their own container as well

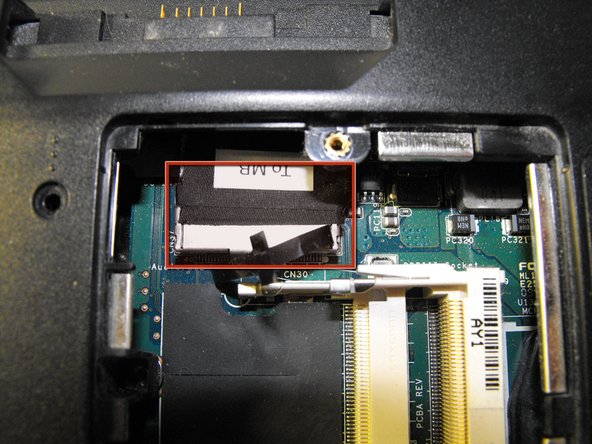
  • Pull up on tab in the RAM bay as indicated. (the black pull tab may detach, don't worry it will not affect performance)

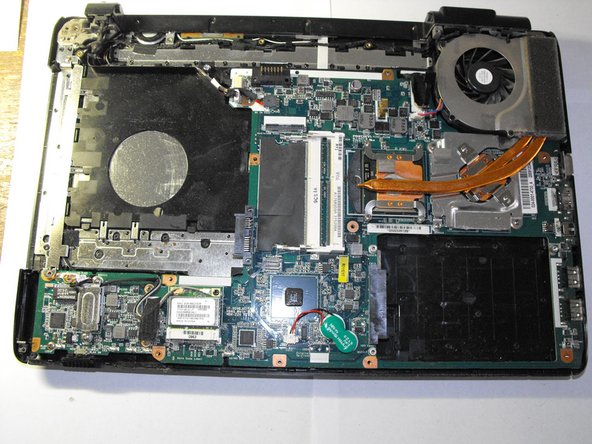
  • Gently begin to pull the bottom casing free

crwdns2935429:0crwdne2935429:0

crwdns2935429:0crwdne2935429:0

crwdns2935429:0crwdne2935429:0

crwdns2935429:0crwdne2935429:0

crwdns2944171:0crwdnd2944171:0crwdnd2944171:0crwdnd2944171:0crwdne2944171:0