crwdns2933423:0crwdne2933423:0

拆开步骤

crwdns2931529:0crwdnd2931529:0crwdnd2931529:0crwdnd2931529:09crwdnd2931529:0crwdne2931529:0

crwdns2936315:0crwdne2936315:0
crwdns2936311:0crwdne2936311:0
crwdns2931653:07crwdne2931653:0
Opening Procedure, Lift the display slightly: crwdns2935265:00crwdnd2935265:01crwdnd2935265:03crwdne2935265:0 Opening Procedure, Lift the display slightly: crwdns2935265:00crwdnd2935265:02crwdnd2935265:03crwdne2935265:0 Opening Procedure, Lift the display slightly: crwdns2935265:00crwdnd2935265:03crwdnd2935265:03crwdne2935265:0
Lift the display slightly
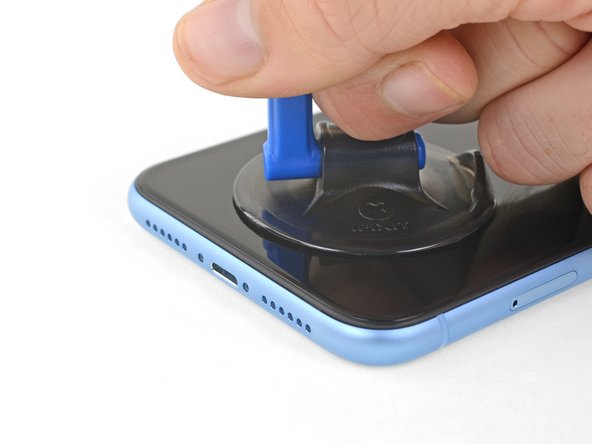
  • Pull up on the suction cup with firm, constant pressure to create a slight gap between the front panel and rear case.

  • Insert an opening pick under the screen and the plastic bezel, not the screen itself.

  • The watertight adhesive holding the display in place is very strong; creating this initial gap takes a significant amount of force. If you're having a hard time opening a gap, apply more heat, and gently rock the screen up and down to weaken the adhesive until you create enough of a gap to insert your tool.

缓缓用力向上拉吸盘,在玻璃前面板和金属外壳之间拉开一个小缝隙。

将三角撬片插入屏幕和塑料边框下方,而不是屏幕本身

固定屏幕用的的防水粘合剂非常牢固;要打开这个间隙可能需要非常用力。如果您发现很难分离屏幕与后盖,请继续加热,并轻轻地拉动屏幕以弄松粘合剂,直到拉开一个可以插入塑料拨片的缝隙即可。

crwdns2944171:0crwdnd2944171:0crwdnd2944171:0crwdnd2944171:0crwdne2944171:0