crwdns2933423:0crwdne2933423:0

Procedimiento de apertura

crwdns2931529:0crwdnd2931529:0crwdnd2931529:0crwdnd2931529:09crwdnd2931529:0crwdne2931529:0

crwdns2936315:0crwdne2936315:0
crwdns2936331:0crwdne2936331:0
crwdns2931653:07crwdne2931653:0
Opening Procedure, Lift the display slightly: crwdns2935265:00crwdnd2935265:01crwdnd2935265:03crwdne2935265:0 Opening Procedure, Lift the display slightly: crwdns2935265:00crwdnd2935265:02crwdnd2935265:03crwdne2935265:0 Opening Procedure, Lift the display slightly: crwdns2935265:00crwdnd2935265:03crwdnd2935265:03crwdne2935265:0
Lift the display slightly
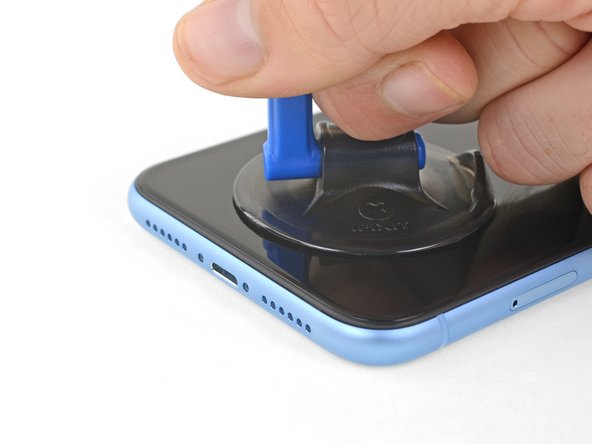
  • Pull up on the suction cup with firm, constant pressure to create a slight gap between the front panel and rear case.

  • Insert an opening pick under the screen and the plastic bezel, not the screen itself.

  • The watertight adhesive holding the display in place is very strong; creating this initial gap takes a significant amount of force. If you're having a hard time opening a gap, apply more heat, and gently rock the screen up and down to weaken the adhesive until you create enough of a gap to insert your tool.

Tira hacia arriba de la ventosa con una presión firme y constante para crear un ligero espacio entre el panel frontal y la caja posterior.

Inserta una púa de apertura en el espacio debajo de la pantalla y el bisel de plástico, no en la pantalla en sí.

El adhesivo impermeable que mantiene la pantalla en su lugar es muy fuerte; La creación de esta brecha inicial requiere una cantidad significativa de fuerza. Si tienes dificultades, aplica más calor y mueve suavemente la pantalla hacia arriba y hacia abajo para debilitar el adhesivo hasta que cree un espacio para insertar la herramienta.

crwdns2944171:0crwdnd2944171:0crwdnd2944171:0crwdnd2944171:0crwdne2944171:0