crwdns2933423:0crwdne2933423:0

Disassembly of Sony Dream Machine ICF-C717PJ

crwdns2936319:0crwdne2936319:0
crwdns2936315:0crwdne2936315:0
crwdns2931653:06crwdne2931653:0
Demontage Sony Dream Machine ICF-C717PJ, Freilegen der Bedienplatine: crwdns2935265:00crwdnd2935265:01crwdnd2935265:03crwdne2935265:0 Demontage Sony Dream Machine ICF-C717PJ, Freilegen der Bedienplatine: crwdns2935265:00crwdnd2935265:02crwdnd2935265:03crwdne2935265:0 Demontage Sony Dream Machine ICF-C717PJ, Freilegen der Bedienplatine: crwdns2935265:00crwdnd2935265:03crwdnd2935265:03crwdne2935265:0
Freilegen der Bedienplatine
  • Um die dreiteilige Tastatur zu entfernen muss man die markierten Schrauben herausdrehen. Der mittlere Tastaturteil kann erst nach Entfernen des kleinen linken und rechten Tastaturteils abgenommen werden. Achtung, manche Schrauben können von Aufklebern verdeckt sein.

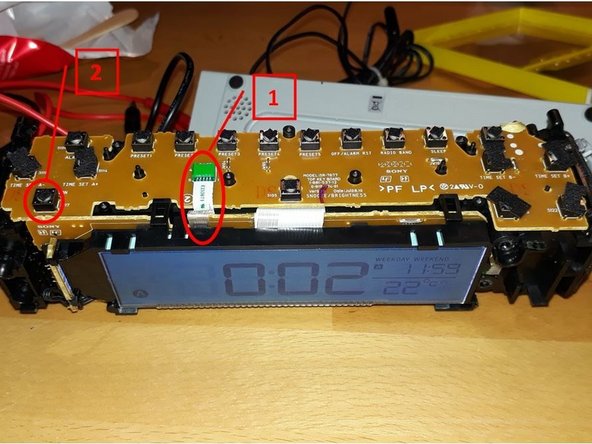
  • Die Bedienplatine mit den verlöteten Mikrotastern ist mit der Steuerungsplatine mittels fünfadrigem Flachbandkabel [1] verbunden. Dieses kann leicht aus der grünen Buchse gezogen werden. Bei dem markierten Taster [2] handelt es sich um die Taste zum Ein- und Ausschalten des Projektors.

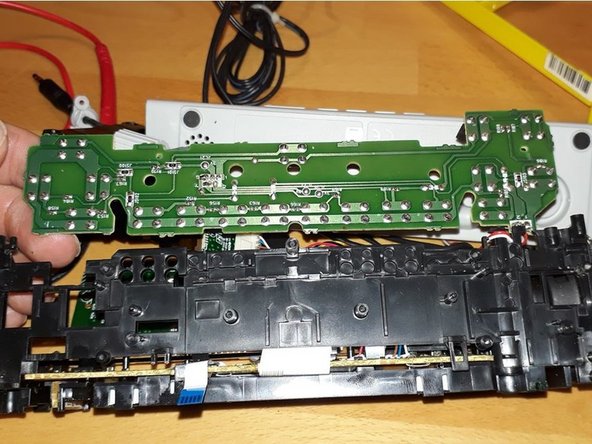
  • Wenn das Flachbandkabel herausgezogen wurde, kann die Bedienplatine leicht gewendet werden und man kann z.B. Mikrotaster austauschen.

  • Bei meinem Gerät habe ich einen Kabelbruch im etwas unglücklich verlegten Flachbandkabel gefunden. Der Austausch des Kabels ist schwierig, vor allem weil es auf der Hauptplatine relativ filigran angelötet ist. Ich habe daher nur für den defekten Leiter einen Bypass eingelötet und das Flachbandkabel belassen.

To remove the three-part keyboard, unscrew the marked screws. The middle keyboard part can be removed only after removing the small left and right keyboard parts. Attention, some screws may be covered by stickers.

The control board with the soldered micro pushbuttons is connected to the control board by means of a five-core ribbon cable [1]. This can easily be pulled out of the green socket. The marked button [2] is the button for switching the projector on and off.

When the ribbon cable is pulled out, the control board can be turned over easily and you can replace e.g. micro pushbuttons.

On my unit, I found a broken cable in the ribbon cable, which was routed somewhat awkwardly. Replacing the cable is difficult, especially because it is soldered on the motherboard relatively filigree. Therefore, I soldered a bypass only for the defective conductor and left the ribbon cable.

crwdns2944171:0crwdnd2944171:0crwdnd2944171:0crwdnd2944171:0crwdne2944171:0