crwdns2933423:0crwdne2933423:0

Google Pixel 3 XL 拆解

crwdns2936315:0crwdne2936315:0
crwdns2936311:0crwdne2936311:0
crwdns2931653:04crwdne2931653:0
Google Pixel 3 XL Teardown: crwdns2935265:00crwdnd2935265:01crwdnd2935265:03crwdne2935265:0 Google Pixel 3 XL Teardown: crwdns2935265:00crwdnd2935265:02crwdnd2935265:03crwdne2935265:0 Google Pixel 3 XL Teardown: crwdns2935265:00crwdnd2935265:03crwdnd2935265:03crwdne2935265:0
  • Now that we've worked our way around the exterior, it's time to head inside.

  • Experience tells us that a little suction and cutting is all that's required to coax the display open, but when that doesn't work we bring out the big (heat) guns.

  • It looks like the Pixel 3 XL still uses foam adhesive, but it's far more tenacious than the repair-friendly stuff we saw last year.

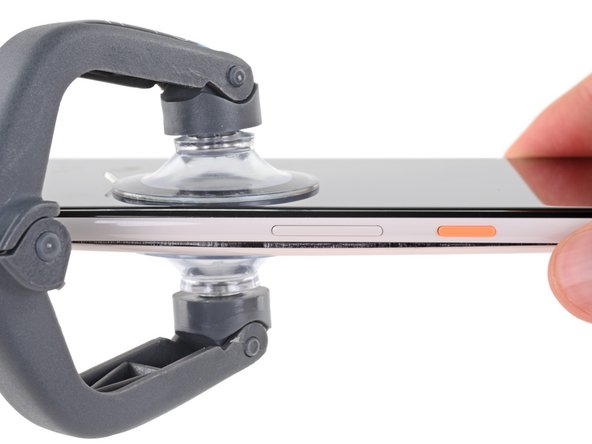
  • We pull out the trusty iSclack, expecting to separate the display assembly, but the rear cover yields first!

  • This whole thing is starting to remind us less of the Pixel 3's predecessor, and more of its notoriously sticky contemporary.

现在我们在外观的工作已经完成,是时候进入内部了。

经验告诉我们只需要一点吸力和切割就可以将显示屏分离开,但是当这些手段不起作用时,我们会拿出大(热)枪。

看起来 Pixel 3 XL 仍然使用了泡棉胶,但是比我们去年看到的那个对维修非常友好的东西要坚韧的多。

我们拿出了可靠的小伙伴 iSclack,期望可以分离屏幕组件,但是背盖先屈服了。

整件事情开始提醒我们 Pixel 3 少了它前任的特点,多了现阶段产品都有的粘度

crwdns2944171:0crwdnd2944171:0crwdnd2944171:0crwdnd2944171:0crwdne2944171:0