crwdns2933423:0crwdne2933423:0

Sostituzione gruppo display del MacBook Pro 13" Touch Bar versione fine 2016

crwdns2931529:0crwdnd2931529:0crwdnd2931529:0crwdnd2931529:02crwdnd2931529:0crwdne2931529:0

crwdns2935425:06crwdne2935425:0

crwdns2936315:0crwdne2936315:0
crwdns2936321:0crwdne2936321:0
crwdns2931653:06crwdne2931653:0
MacBook Pro 13" Touch Bar Late 2016 Display Assembly Replacement, Remove the screen: crwdns2935265:00crwdnd2935265:01crwdnd2935265:03crwdne2935265:0 MacBook Pro 13" Touch Bar Late 2016 Display Assembly Replacement, Remove the screen: crwdns2935265:00crwdnd2935265:02crwdnd2935265:03crwdne2935265:0 MacBook Pro 13" Touch Bar Late 2016 Display Assembly Replacement, Remove the screen: crwdns2935265:00crwdnd2935265:03crwdnd2935265:03crwdne2935265:0
Remove the screen
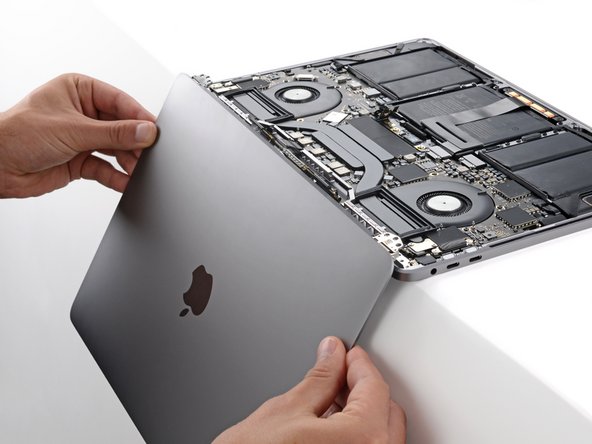
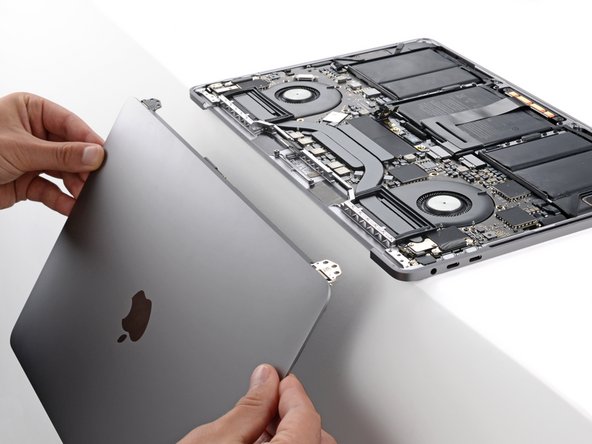
  • Free the right hinge and remove the screen.

  • During reassembly:

  • Make sure the screen hinges are fully open and guide them into their recesses in the frame.

  • Be very careful not to damage the Touch Bar connector when inserting the left hinge.

  • Partially tighten the six hinge screws.

  • Close your laptop and make sure the screen is properly aligned. If it clicks or snaps, readjust the alignment.

  • Fully tighten the hinge screws.

Libera la cerniera di destra e rimuovi lo schermo.

Durante il riassemblaggio:

Assicurati che le cerniere dello schermo siano completamente aperte e guidale nei loro alloggiamenti nel telaio.

Fai molta attenzione a non danneggiare il connettore della Touch Bar durante l'inserimento della cerniera sinistra.

Stringi parzialmente le sei viti delle cerniere.

Chiudi il laptop e assicurati che lo schermo sia correttamente allineato. Se si sente un clic o un scatto, riaggiusta l'allineamento.

Stringi completamente le viti delle cerniere.

crwdns2944171:0crwdnd2944171:0crwdnd2944171:0crwdnd2944171:0crwdne2944171:0